Welcome to my stop on the Halloween Haunts 2015 Blog Hop organised by Marian at Seams To Be Sew and sponsored by Fat Quarter Shop.
Thanks for dropping by, I'm excited you're here because this may just be one of the coolest things I have ever made! There's a great video towards the end of this post so you can see the full effect of the lights and what a nice addition LED lights are!
It is simple to make and a fun way to decorate for Halloween, so I'm going to run through how to make your own flashing hoop...

Supplies:
· embroidery hoop - The diameter is dependant on the light strip you use, mine is 5"
· light strip - I bought this one LED Light RGB Strip 50cm 19.7in (batteries not included so be sure to check and get batteries if you need to)
· a piece of fabric, larger than the hoop
· white felt
· black thread and white thread, use embroidery thread or perle thread
· a needle· a pen
· a rubber band
· pinking shears (optional)
1. Put the fabric into the hoop, making sure it is nice and taut.
2. Draw a ghost shape onto felt or use the adorable ghost template from the Flying Felt Ghost Toy project by the talented Mollie at Wild Olive (please note the template is for personal use only), which I used here. Cut out the shape and draw on eyes and a mouth.

2. Position the ghost on the fabric. Using the perle thread come up through the back of the fabric and stitch the eyes (French knots) and mouth (backstitch).
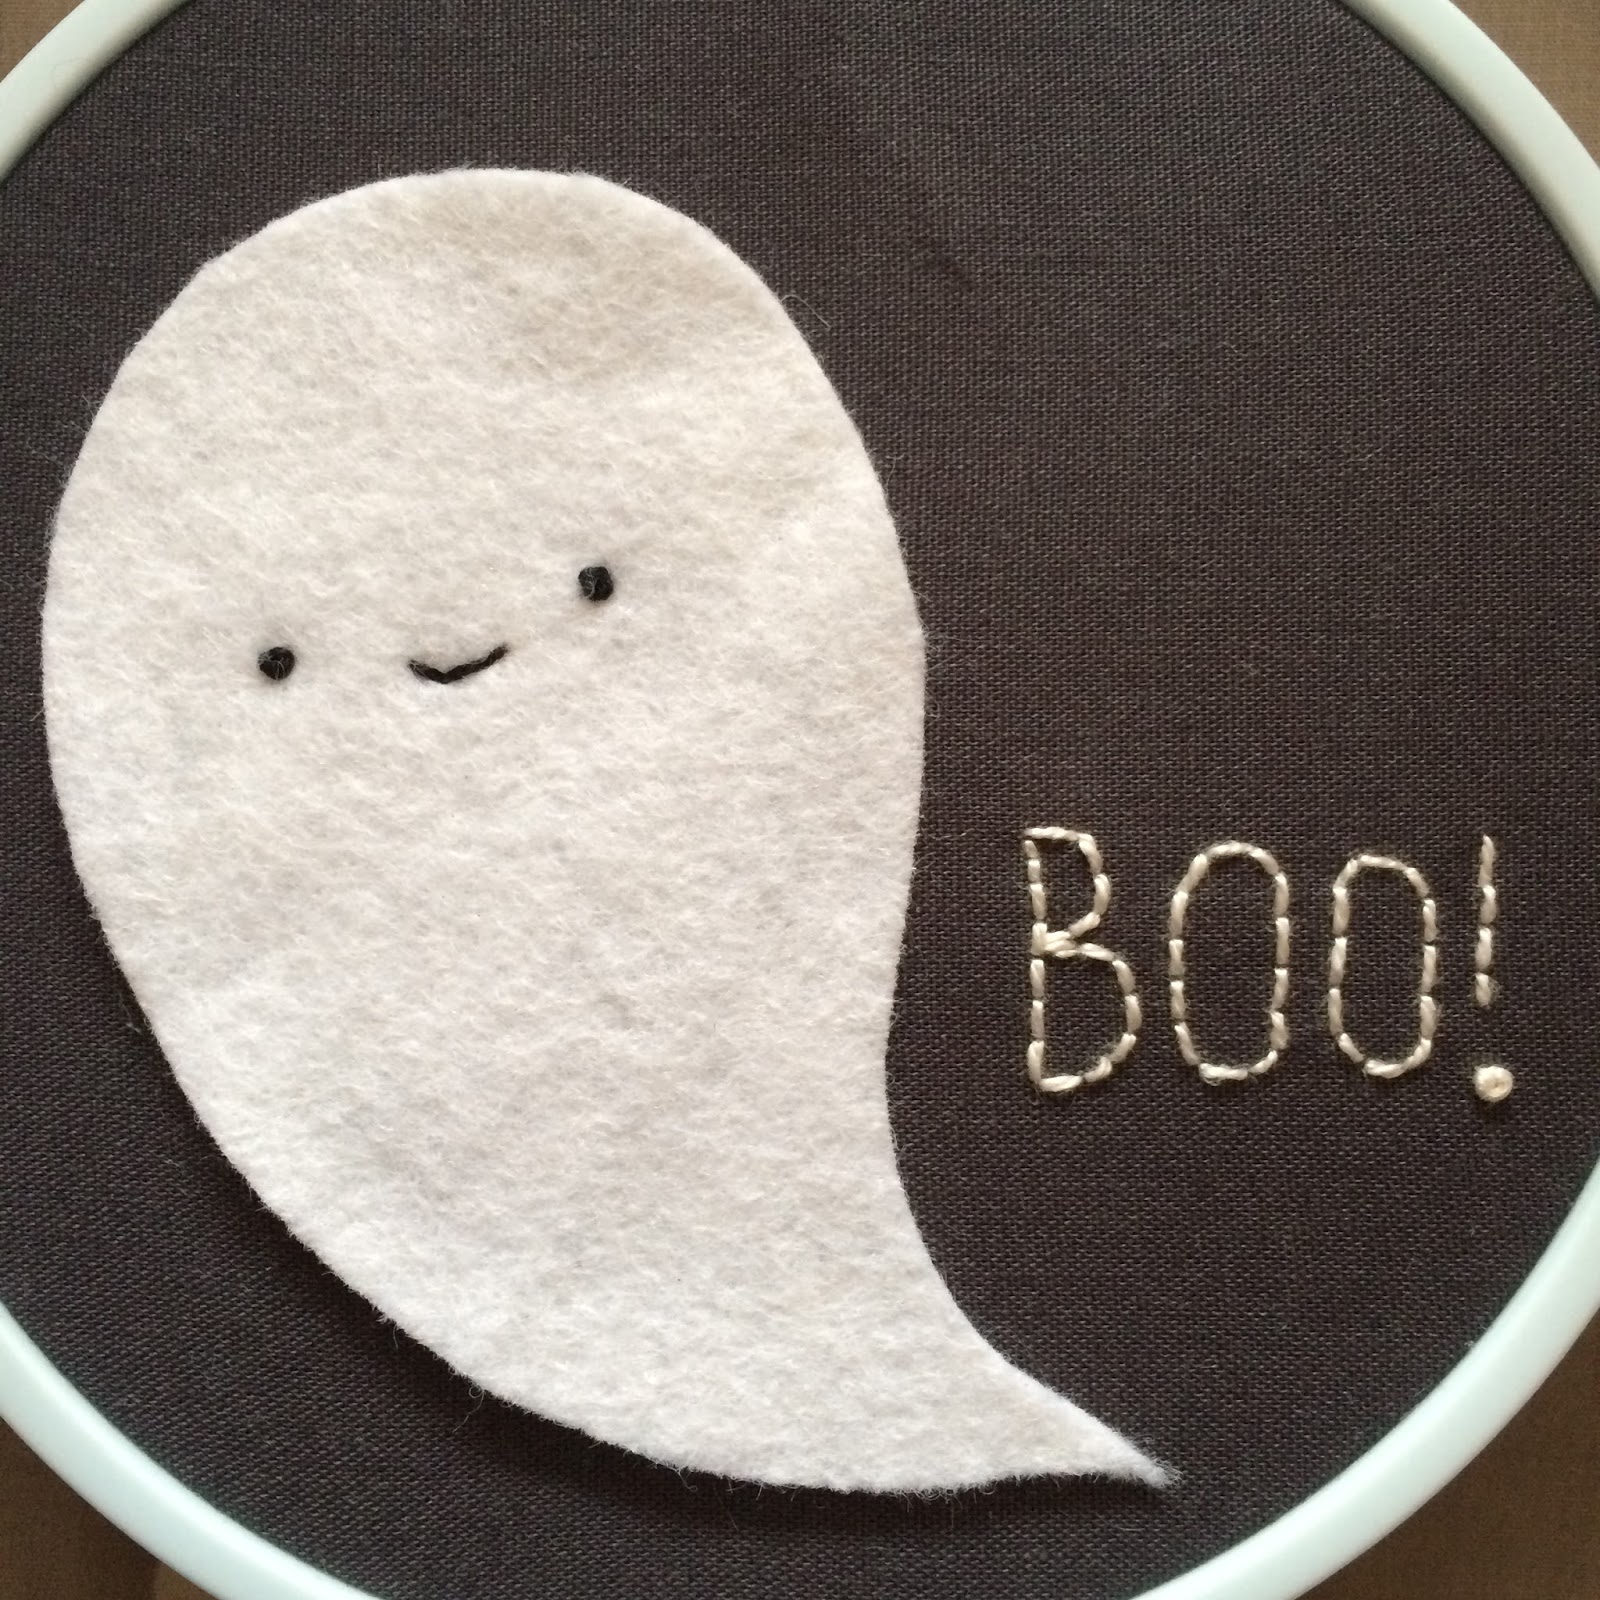
3. Write Boo! and stitch (backstitch).
4. Trim the excess fabric, if you use pinking shears it stops the fabric from fraying.

5. Undo the embroidery hoop, place the rubber band around the back part of the hoop so it's horizontal.

6. Put the fabric back in the hoop and make sure it's taut. Take some thread, tie a knot and do a running stitch around the fabric, pulling slightly as you go so it gathers and tie another knot when you reach the end.

There are different ways to finish a hoop but I recommend this one as it helps keep the battery pack in place. It's also the best way to ensure the fabric remains taut and can be readjusted in the future.
Take your strip and see if you need to trim any of the LEDs, if you trim make sure you trim the right end! Peel back the paper and stick the strip to the outer edge of the hoop, pressing with your fingers as you go. Tuck the battery pack in behind the elastic. Add a loop of ribbon to the top, hang it up and your flashing hoop is good to go.
I will be hanging this in the window on Halloween to encourage the trick and treaters to knock!
If you can please watch the video because it shows it to full effect (turn the volume off if you are at work though!) and if it won't play check out my instagram because I will post it there too (you don't need an instagram account to watch it). Warning, as the title suggests the video contains flashing images.
The cool thing is you can easily change this up, replace the embroidery with whatever theme / holiday you want and you can twinkle all year long.

Do let me know if you make a flashing hoop, I would love to see!
107 comments
Post a Comment
Oh what a cute idea, just love it! Thanks so much!
Hugs Martina
This is such a fun idea. Thanks for the tutorial!
That is so cute. We don't really do Halloween here but my girls would go bananas for this
Ooo scary! great idea Lucy!
What a cool idea! You are such a clever girl Lucy!
That is awesome! Love the shape of the ghost and the fact that it lights up!
A totally genuine idea. Very creative
My grandsons would love this - sending tute post to my daughter.
I've never seen anything like this before -- so clever!
Oh WoW!! Super cool idea!! Thanks for showing how you made this project. I see flashing hoops in my future.
Too cool!! you did a great job. Thanks for the tute!
Such a cool idea!! Thanks for sharing the project!!
Very cute. I love the lights.
Adorable and very creative!
Very cool idea!
I will have to make one of those. So spooky!
Thanks for the tutorial !!
This is really cute, thanks for the tutorial.
Very cute, thanks for sharing
cork@pa.rr.com
Thank you for tutorial!
That is sew cute.. and what's really fun it seeing the little video.
A new idea for the Halloween Blog..love it. Thanks for the video, too.
What a great idea and so very cute! Thanks for the tutorial!
Cute Little Ghost! A Quick and Easy Project!
I love this! And my little one would too!!! Thank you for sharing!
What a great idea!
So simple but so impactful. Thanks for the mini tut. Just great.
That is great. Thanks for the tutorial!
What a clever idea! Thanks for sharing.
wonderful and simple idea
What a "Flashy" Halloween project...perfect for letting Trick or Treaters know your house is Open For Business!!!!
Gmama Jane
What a "Flashy" Halloween project...perfect for letting Trick or Treaters know your house is Open For Business!!!!
Gmama Jane
How fun is that!!!
Now that is just too Cute!!! GREAT JOB!
Cute light. 24Tangent@gmail.com
What a cute and clever idea! Love it!
That is too adorable!
Oh my gosh, this is just too cute. I've got to try this. I can see one for Christmas with "Santa Stop Here" too. Wouldn't that be cute?
Spooktacular. Total #CreativeGoodness
QuiltShopGal
www.quiltshopgal.com
That is so cute! I need to make one for my daughter -
Beth
oneoldgoat1962@gmail.com
I love it!
Pretty darn flashy!!
Cute ghost-y
This is just too cute!!! Thanks for the tutorial :o)
cwayons(at)yahoo(dot)com
What a neat project. And such a clear, easy to understand tutorial. Happy Halloween.
How cleaver. I love it.
VERY CUTE! THANKS FOR SHARING !
LINDA msstitcher1214@gmail.com
Cute project! Thanks for the tutorial!
very clever@!
What a novel idea, I would never have thought of it.
shw_samuel@sky.com
What a great idea....it is adorable!
Cute tute!
Very cute. I'll have to look for lights like that.
Absolutely brilliant, I have not seen lights like that before. Very effective.
That's a cute Boo.
Renragjdatgmaildotcom
Great idea & very cute ghost!
Cute tute!
That was different ty my grandson loved it...happyness04431@yahoo.com
What a cute idea!
Such a great idea for Halloween - you are very clever. Love your quilts especially the Bienvenue Baby quilt and Johnny Cash!!
Pauline
perry94022 at hotmail dot com
So fun! You could do a whole line of them for a flashing banner :)
Such a super cute idea. I may have to whip one up!
very cute idea
How clever! and different. I love it. I need to check out those tiny lights. Thanks for sharing this with us. Happy Halloween.
Sooooo very Spooky
I do like it :)
ehodasz at yahoo dot com
That is adorable! And such a quick project, too! Now if I can find the lights it will be perfect. It looks like a lot of fun and something older children can do.
My email is: bestbelle2010@aol.com
Thanks!
Cute idea, thanks!
Great idea!! Thanks for the chance to win.
That is so creative! Thanks for the chance to win!
What a cute idea. I'll have to make one with my granddaughter! Thanks!
This one even our young ones can do. Thanks for sharing!
'Sew' cute - what a great idea!
What a great idea xx
Very cute project!
Cute project!
This is just too cute/ crystalbluern at tds dot net
So cute, I love to see ghosts that don't look so scary and I always like to see lights for any holiday.
Very cute. We don't have kids so Halloween isn't a big thing in our house but this technique could easily be used for any holiday or event. You could even have interchangeable sewn middles for all the different holidays, events & people's birthdays!
Sew cute, very clever!
Very clever!
Oh boy, I love this simple and wonderful idea. Thank you for sharing it. It's just in time for Halloween!!
This is such a cute idea, and it does look easy to do. Thanks for the tutorial. mtmom57@gmail.com
Cute idea--especially since it can work for any occasion. senstrings at yahoo dot com
Super cute and easy! I just thought WOW - how cool is that?
Great idea. Thanks for sharing
Great idea. Thanks for sharing
I have the perfect spot for this little hoop! We have a long narrow window next to the front door that has an outlet near it, too! I am anxious to try this. Thanks so much!
Awesome idea!
This is a great idea! I'll have to look for the light strip.
This is SO cute!! Thank You!
What a cute idea. Thanks!
This is adorable!
debbygrawn at yahoo dot com
What a darling ghost!
nikilsend(at)outlook(dot)com
Too cute! I need to make for the grandkids-they'll love it.
Too cute! I need to make for the grandkids-they'll love it.
This is great! Cute, unique and it looks like lots of fun.
This is great! Cute, unique and it looks like lots of fun.
what a cute idea..... thanks for sharing
institchesandseams@hotmail.ca
And the LED changes colour too? That is fun! well done you!
Clever idea Lucy
Way 2 cool
What a fun idea! Well done Lucy!
Great idea with the rope light, love it!
What a clever cookie you are! Always thought you might be a bit of a flasher and here is the proof!