Wild Olive
Showing posts with label Wild Olive. Show all posts
colouring sticker fun!
The Wild Olive patterns and printables are so adorable and I was thrilled to see the Kawaii Christmas Coloring Pages that Mollie released the other day - with a link to another Kawaii Coloring Picture.
In a moment of genius I decided to print them on A4 sticker paper (I got 100 sheets from Amazon for £4.75) and we have been having so much fun colouring our own stickers!
for £4.75) and we have been having so much fun colouring our own stickers!
I suggest colouring them all first and then cutting out the ones you want to use. The kids have all had a go and it keeps them really busy! After all it's colouring and stickers!! Even my husband had fun (despite the fact I had accidentally printed his on the wrong side so they weren't stickers!).

Here are my colourings (not all done yet)...

I know colouring books are a big trend but honestly it's not my thing, I do like colouring though and the fact I could cut these up and use them as stickers meant I really enjoyed it! I've even put some in my planner already :)

Yes I am a big kid when it comes to stationery. Stickers are my love and kawaii stickers are even better!
You can get the printables at Wild Olive but be quick because they are only available for a short time! Also please be respectful and remember they are for personal use only.
Happy colouring and sticking!
Linking up to crazy mom quilts for finish it up friday
flashing Halloween hoop tutorial
Welcome to my stop on the Halloween Haunts 2015 Blog Hop organised by Marian at Seams To Be Sew and sponsored by Fat Quarter Shop.
Thanks for dropping by, I'm excited you're here because this may just be one of the coolest things I have ever made! There's a great video towards the end of this post so you can see the full effect of the lights and what a nice addition LED lights are!
It is simple to make and a fun way to decorate for Halloween, so I'm going to run through how to make your own flashing hoop...

Supplies:
· embroidery hoop - The diameter is dependant on the light strip you use, mine is 5"
· light strip - I bought this one LED Light RGB Strip 50cm 19.7in (batteries not included so be sure to check and get batteries if you need to)
· a piece of fabric, larger than the hoop
· white felt
· black thread and white thread, use embroidery thread or perle thread
· a needle· a pen
· a rubber band
· pinking shears (optional)
1. Put the fabric into the hoop, making sure it is nice and taut.
2. Draw a ghost shape onto felt or use the adorable ghost template from the Flying Felt Ghost Toy project by the talented Mollie at Wild Olive (please note the template is for personal use only), which I used here. Cut out the shape and draw on eyes and a mouth.

2. Position the ghost on the fabric. Using the perle thread come up through the back of the fabric and stitch the eyes (French knots) and mouth (backstitch).
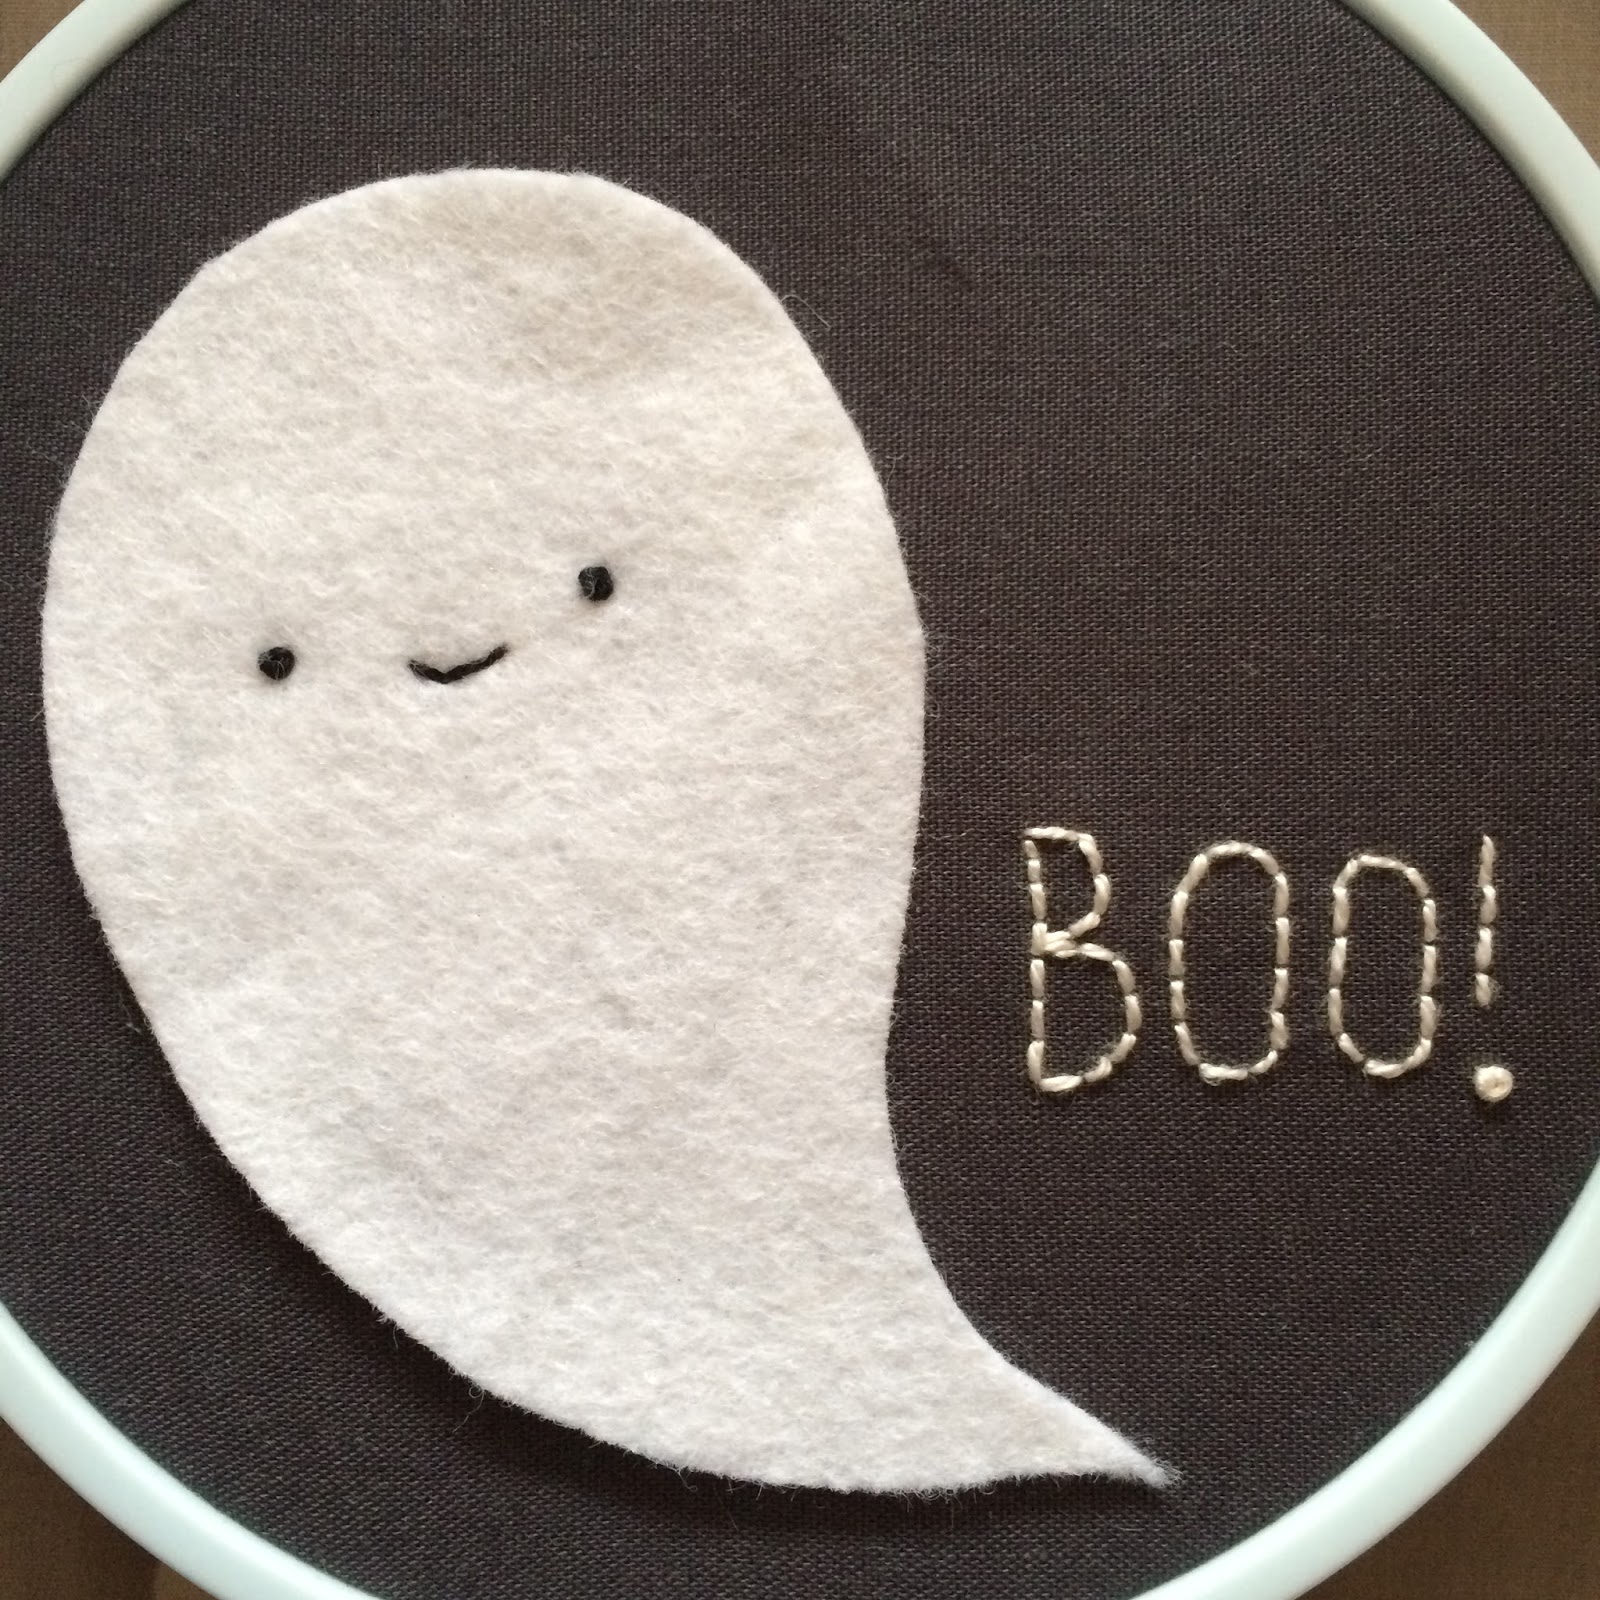
3. Write Boo! and stitch (backstitch).
4. Trim the excess fabric, if you use pinking shears it stops the fabric from fraying.

5. Undo the embroidery hoop, place the rubber band around the back part of the hoop so it's horizontal.

6. Put the fabric back in the hoop and make sure it's taut. Take some thread, tie a knot and do a running stitch around the fabric, pulling slightly as you go so it gathers and tie another knot when you reach the end.

There are different ways to finish a hoop but I recommend this one as it helps keep the battery pack in place. It's also the best way to ensure the fabric remains taut and can be readjusted in the future.
Take your strip and see if you need to trim any of the LEDs, if you trim make sure you trim the right end! Peel back the paper and stick the strip to the outer edge of the hoop, pressing with your fingers as you go. Tuck the battery pack in behind the elastic. Add a loop of ribbon to the top, hang it up and your flashing hoop is good to go.
I will be hanging this in the window on Halloween to encourage the trick and treaters to knock!
If you can please watch the video because it shows it to full effect (turn the volume off if you are at work though!) and if it won't play check out my instagram because I will post it there too (you don't need an instagram account to watch it). Warning, as the title suggests the video contains flashing images.
The cool thing is you can easily change this up, replace the embroidery with whatever theme / holiday you want and you can twinkle all year long.

Do let me know if you make a flashing hoop, I would love to see!
Kids 'Good' reward chart
Despite my best attempts at cajoling the children to help me finish the project for them they just were not interested! So I finished it last night and they've spent the morning admiring and playing with it.
This isn't a full tutorial but I give an idea of my process and how it was constructed.
Here is our list of house rules before and we have had various homemade sticker charts but they never last long and the children lose interest:

Although I love the sentiment, this just was not that pleasing to look at! And since I now know how to sew, it only made sense to make something prettier:

It is a reward chart and rule reminder in one. I decided just to call it 'Good' - after all that's what I'd like my kids to be!

It was made of really simple elements and the stitching took the most time. I did some embroidery on a long length of plain fabric, to which I added a pocket, a felt panel with their names on and our list of house rules (with the new addition of 'always try your best', thanks to school!). The rules were printed from the computer onto some fabric especially designed for printers - this was a first for me and really fun to do.

Once I'd sewn the front bits together how I wanted them (leaving space for the felt panel) I sewed it to some wadding and added some hanging tabs. Then I put the backing fabric and the front panel right sides together, sewed around the edges (leaving a space for turning), turned it inside out and stitched around the edges. Then I added the felt panel by stitching it on with perle thread and I also hand stitched around the rules.

The 'rewards' are these little embroideries I made, all the patterns are from 'Sublime Stitching' by Jenny Hart (as are the lanterns at the top). The inspiration to make them into these little circles came from Wild Olive and Mollie's fabulous tutorial for school merit badges. I didn't use pins but just stuck some velcro on the back so the kids could easily stick them on themselves.

The really fun bit for me is, as the kids get fed up looking at the same pictures, I can easily stitch up some different ones. Win - win!


You could incorporate whatever you wanted into a chart like this for kids, maybe using the embroidered badges as reminders of chores or routines in the household. I would love to see if anyone makes one and please let me know if you do!
This is another check off my finish-a-long list with Quilter in the Gap.
We might have very well behaved children this weekend, what with the novelty of the chart and the joy of Advent calenders.
I'm also planning on going to the Portable North Pole again this year so I can make a couple of free videos for them both from Santa. If you have young children you really have to take a look at this, it's just brilliant! Oh and don't be afraid to say they've been naughty, Santa is very kind and tells them there's still time to behave. It is really well made and so nice that it is free (obviously you can buy them or buy other merchandise but you don't have to!). Off to decide whether mine have been good or bad!
Linking up:

at the wonderfully creative Making Rebecca Lynne this week
(go see her gorgeous Liberty scarf and I personally love that wallpaper!)
and Finish It Up Friday at Crazy Mom Quilts

Subscribe to:
Posts (Atom)