I am excited to be writing about this make because it's such a fun and useful way to use English paper piecing shapes/blocks. I've made a new project bag and decorated it with epp. There are so many tips and tricks I can share with you; epp curves, light fabrics on dark backgrounds, neat applique top stitching and the awkwardness of metal bits on zips - oh I'm covering it all today!
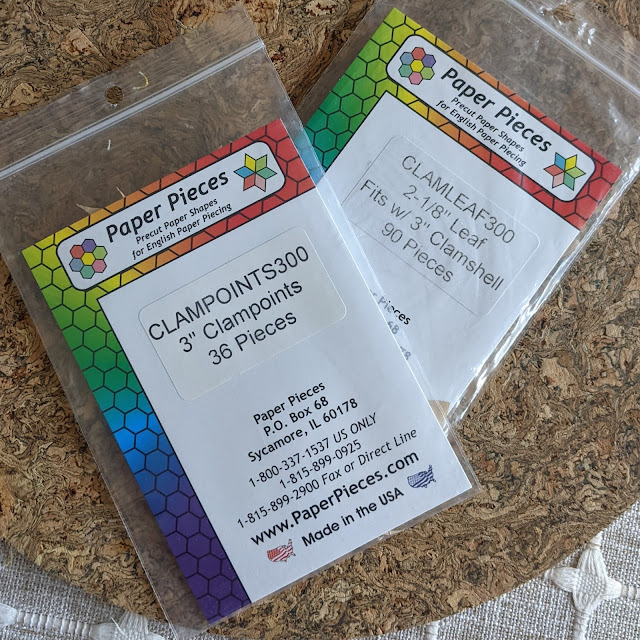
This month's Aurifil Artisan challenge is in collaboration with Paper Pieces. I had thought about doing clamshells but I wanted to create something a bit different and, having used these papers before, I knew this was what was needed. Paper Pieces produce accurately cut papers and that is crucial for the precise curves and points of these shapes.
My project used 3" Clam Points and 2 1/8" Clam Leaf pieces.
EPP curves
I take different approaches when it comes to basting curved shapes. Usually I will thread baste convex shapes like the leaves, it really does work better and holds the fabric so well. In this case I went for the time saving option of glue basting, it turned out fine but I don't think you get quite the same crispness of the edges and that can affect the points. In some cases the leaves slipped slightly and I had to unpick some stitches because the fabric wasn't taught around the leaf. So it really isn't that time saving! It will depend on how much you handle a piece, how much glue you use (I don't like using a lot) and how well you baste as to whether you get movement or papers popping out. Of course it is personal preference but I do think I will stick to thread basting these types of shapes in the future.
Now the concave Clam Points are different, this is far easier to glue baste in my opinion and it works beautifully. The key is clipping into the seam allowance, as you can see below. You don't have to clip a lot, just a few little snips and be careful not to snip in too far. Enjoy the backside view...
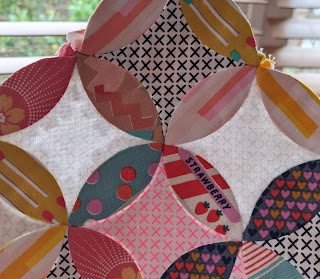
My vision was to make a block or panel that was 'unfinished' to allow the focus to be on the shapes, the repetition that is there and also not, so the negative space around it puts emphasis on the curves. You can imagine that the panel is a fragment of a larger pattern. It was challenging to arrange the shapes how I envisioned. There were so many different ways to leave it 'unfinished' around the edges. I liked it being symmetrical because it seems more intentional that way but depending on where the leaves were it still looked too complete. Ultimately it was leaving off the two leaves on the upper section at the sides that gave me the panel as I envisioned, to look as though this is an uncovered piece that has been revealed.
light on dark
The background for the panel is one of my favourite prints from Blueberry Park by Karen Lewis Textiles. It works well to show off the epp but when you put lighter fabrics on top of dark you risk seeing the seam allowance. Sometimes that doesn't bother me but when you've clipped the seam, as with these curves, it is a bit more noticeable. It doesn't show too well in the first photo but you can see the difference between the left and right Clam Points below:
It gives a much more even finish and brightens up the white fabrics. I added the wadding behind each of the Clam Point shapes, even though some didn't need it but it made the texture even. I did not do this for the leaves, as they are all prints and it wasn't needed.
Next I added some hand sewn crosses in the centre of the clam points using Aurifloss. This helped baste the bits of wadding and added a nice detail.
The background was quilted with a straight line cross hatch using Aurifil 50 wt thread in #2625. I really like using quilted backgrounds when I do applique. Sometimes I quilt over the applique too but in this case I quilted the background first.
applique
I use a fabric glue pen to baste the epp panel in place, leaving the points and dog ears sticking out.
You can use glue to hold those points under but I like things to be secure and neat before machine sewing so I took the extra time to do a bit of hand applique. I find hand sewing easier when it comes to tricky points, I just do an invisible ladder stitch to applique, tucking the points under and stitching the edge down. I only did this at the points/dog ears, not around the whole piece.
Aurifil threads used: Aurifloss #2692 and #2024 for hand cross stitches; 50 weight #5002 for sewing and topstitching on project bag; monofilament MT1000 for applique and 50 wt #2625 for quilting the background. Not shown 50 wt #2600 used for English paper piecing the shapes.
That quilted panel formed the back of the project bag and the front was made with glittery vinyl and original Cotton & Steel fabrics. The bag measures 14 x 12" so easily fits A4 patterns and more. I based it on this Fat Quarter Shop tutorial, which I also used to make my last project bag.
metal ended zip
The zip I had was just long enough but I always find the metal ends a bit terrifying! Usually I use longer zips and just trim them down but the hot pink with the orange was too good.
The issues I have is what if I hit the metal end with a needle?! Then I overcompensate and don't get close enough, so I ended up with some extra zip tape on one side. Not aiming for perfection but it looked horrible. Now this can be solved with fabric zip ends, which I also do sometimes but since this is flat, it's nice to have the full width of the zip. So I did what crafters do, I made do and hid it!! When sewing on the binding I added a piece of folded ribbon, strategically placed to hide the end of the zip.
I hope some of these tips help you and that it might encourage you to add some English paper piecing to your projects. Challenge yourself and find some new shapes, create different patterns and play! Thanks to Paper Pieces and Aurifil.


5 comments
Post a Comment
Those are fun EPP shapes. I'd not seen them before.
Gorgeous and very unique looking pouch. Love it!
This was such a useful post, I would never have thought of adding wadding under the individual shapes to make it more uniform. x
Can you please show me how you turn the very bottom point of the clamshell please? I cannot figure it out
Can you please show me how you turn the shape bottom point in please? I cannot figure that out
Hi Pansy. If you look at the first picture under the Applique heading, I leave the dog ears out and then to hide them I use my needle to push them underneath the shape before stitching it in place. Hope that helps!