Search Results
Showing posts sorted by relevance for query farmer's wife. Sort by date Show all posts
you can do this ~ Fanny, Dinah and Farmer's Wife
#32 Fanny
I enjoyed this positive account of farming life contrasted against her siblings, "They live in towns and work all day with other people's plans and problems". I used the brown sprinkles for "the dark earth" and florals, "an opalescent haze of coral and violet buds". The Lucky Strike print perfectly reflects her happy and fun attitude, "This is life!".

#27 Dinah
There is so much in this letter that strikes a chord with me - how I feel, despite the problems, about the joys of my home.
"My home: It is sweet to hear my children laugh and play. There is still romance in waiting for Daddy to come in from the field. There is deep content in having someone to quarrel with, to love, to take care of, the scold and to forgive."
I chose prints that were busy, dark with gentle, to give movement and contrast. Work and play!

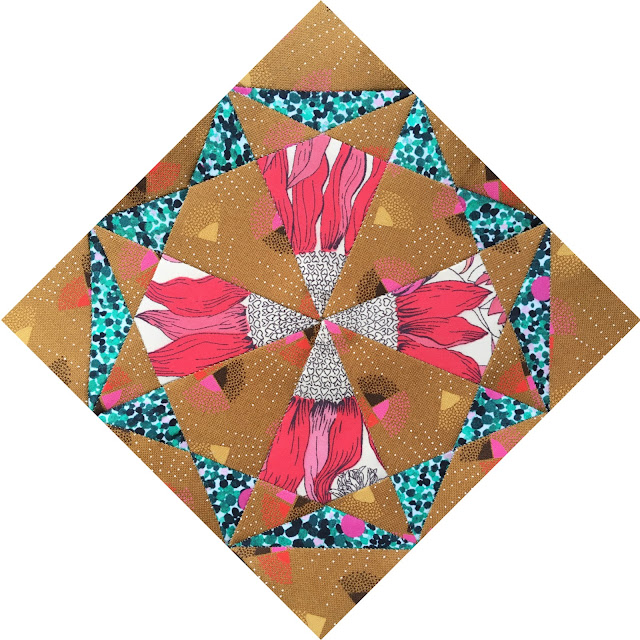
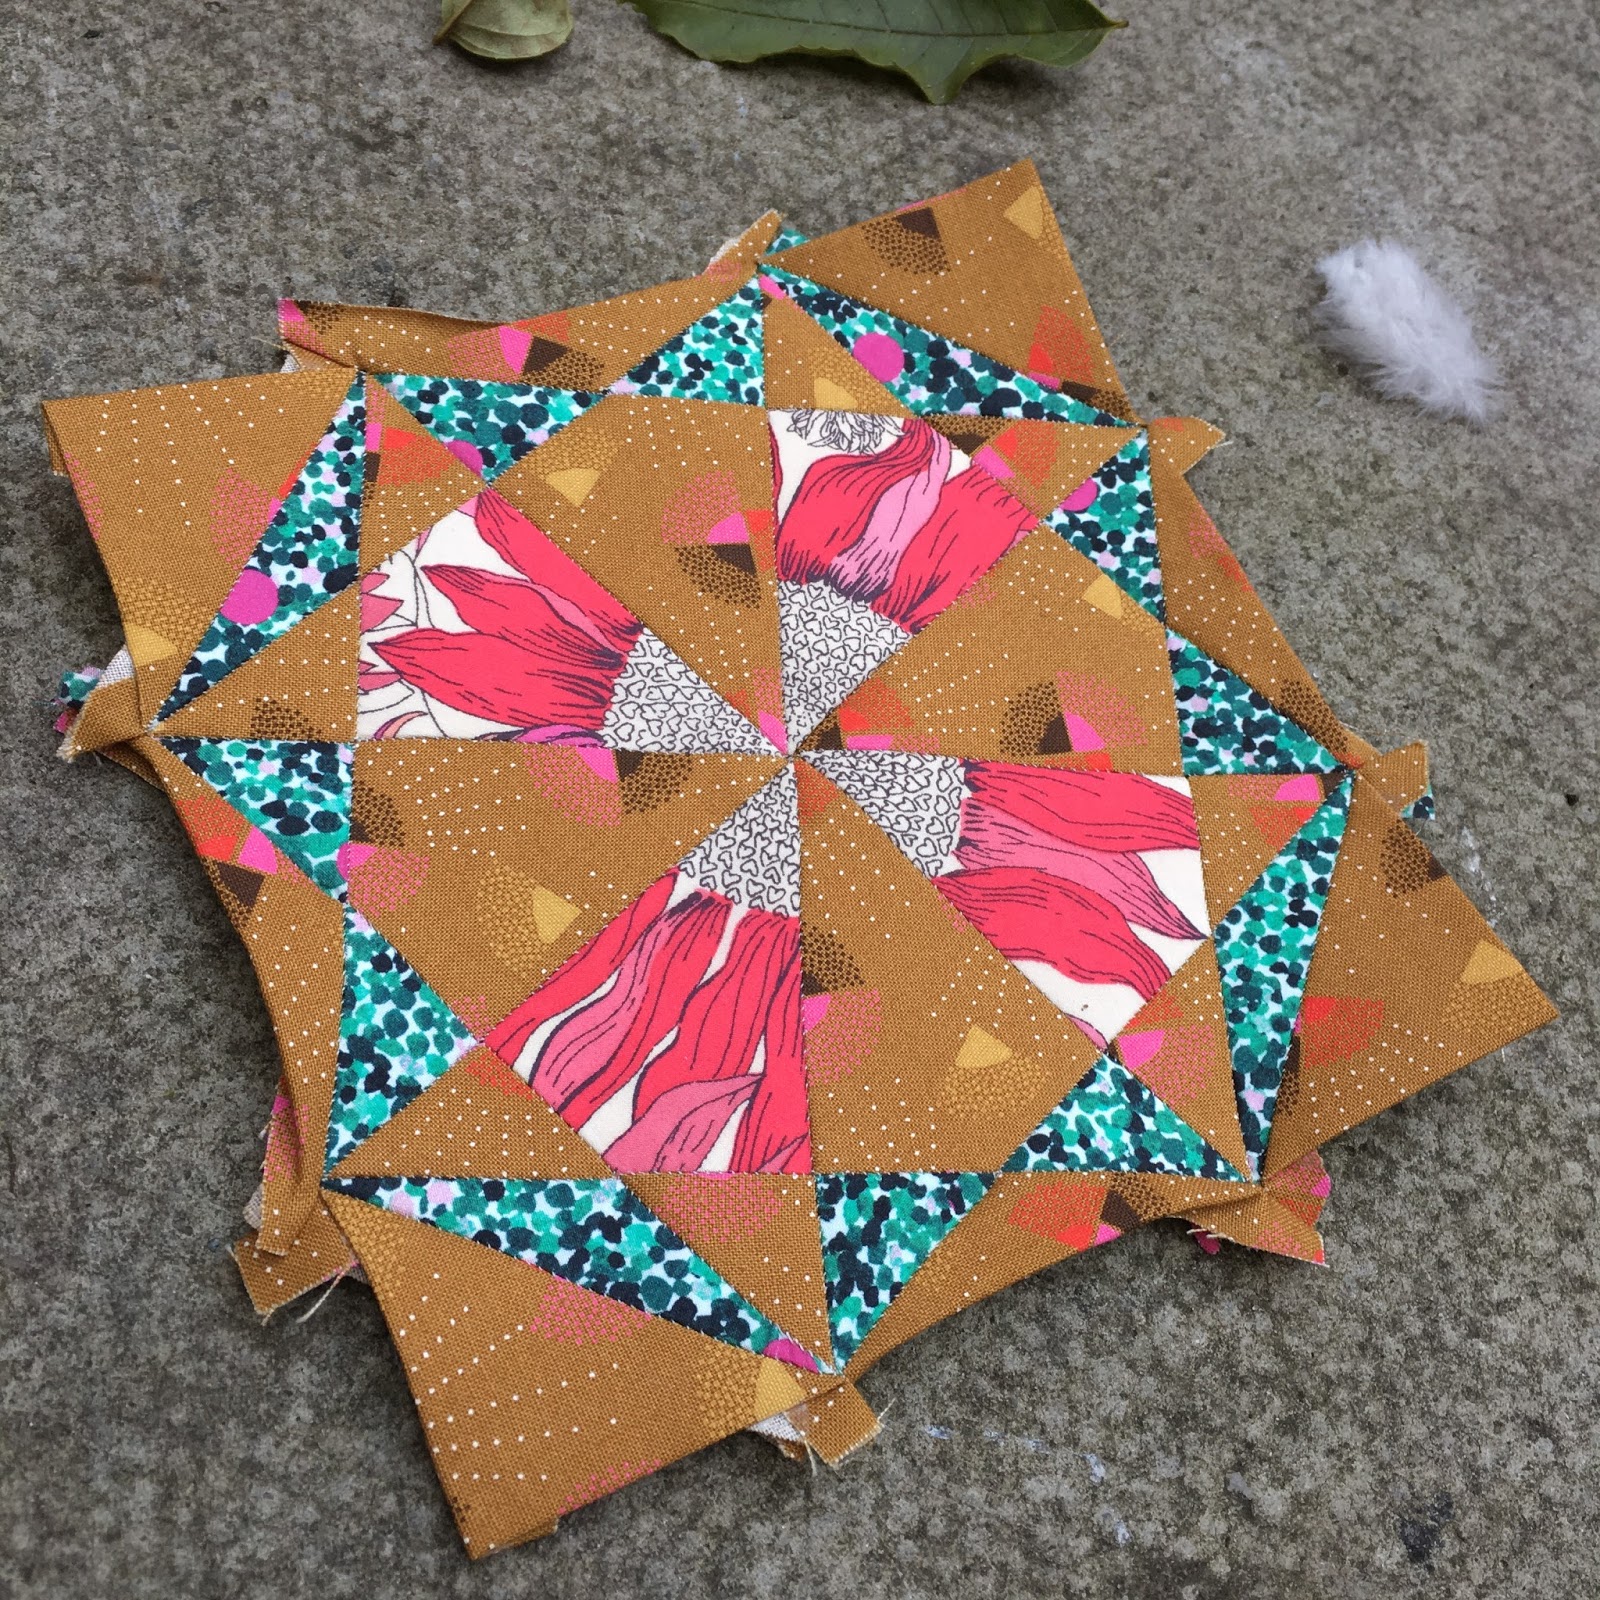
#33 Farmer's Wife
This farmer's wife talks about the benefits of raising her seven children on the farm. "The finest advantage I can offer my children is this chance to know nature intimately". So I chose the brown floral and used it with the pink sprinkles for the love she has for the farm. "I'm thrilled when anyone speaks of me as a farmer's wife. I'm proud of the name."

They also look like pink cats, or foxes or batman!
the urge to sew ~ Mrs Fay ~ Farmer’s Wife 1930’s Sampler Quilt Sew-Along
I'm back for my turn as a guest blogger for the Farmer's Wife 1930's Sampler Quilt Sew-along with Fat Quarter Shop and Gnome Angel. Today's block is #68 Mrs Fay.

For this block I went back to hand piecing, I really enjoy it and it is quicker than English paper piecing. To see my hand piecing tutorial click here.
I did manage to goof part of this block while I was sewing it together but it was a simple fix and the block isn't hard if you are concentrating! I found it easiest to piece the four components, as in the assembly instructions, and then sew two pieces to opposite sides of the square:

Then I sewed the other two parts in, like piecing a jigsaw! I definitely prefer to do things like that by hand rather than machine. *please excuse the gloomy picture above, it was late at night and I wanted to keep sewing!
#68 Mrs Fay
The letter describes the wife's surroundings in Iowa, "Sheer beauty lying all around us if we but care to make it our own". I chose the orange and gold Carkai print for the "sun setting in a glory of rose and gold". The neutral Cotton and Steel print is to represent "the snow and sleet that change our common surroundings to fairyland".
It resonates with me to think that we can step outside of our worries and all the 'to dos', even if just for a brief moment, to appreciate that it is "glorious to be alive". Admiring the beauty of nature can indeed make us feel "calm and exhilarated", if we take time to notice it.

Those corner points do meet, I just didn't press it very well and need to press those seams open rather than to the side I think!
I really enjoyed making this block and it looks beautiful whether you have it straight on or on point!

The Farmer’s Wife 1930s Sampler Quilt: Inspiring Letters from Farm Women of the Great Depression and 99 Quilt Blocks That Honor Them by Laurie Aaron Hird for Fons & Porter/F+W; RRP $28.99 – Click here to purchase.

quilt for the soul ~ Farmer’s Wife 1930’s Sampler Quilt Sew-Along
Today is my first post as a guest blogger for the Farmer’s Wife 1930’s Sampler Quilt Sew-Along with Fat Quarter Shop and Gnome Angel. It is such a thrill to be part of such a dynamic and assorted Sew-Along!

The Farmer’s Wife 1930s Sampler Quilt: Inspiring Letters from Farm Women of the Great Depression and 99 Quilt Blocks That Honor Them by Laurie Aaron Hird for Fons & Porter/F+W; RRP $28.99 – Click here to purchase.
I will be showing how I constructed #12 Becky and #16 Bonnie using English Paper Piecing, as well as sharing general tips that apply no matter what piecing method you use.

Please note this is not a tutorial on how to English Paper Piece (epp), if you would like to learn I recommend this tutorial by Clare at Selfsewn - I had never done it before I came across her blog and she taught me well! There is also a great tutorial by Angie at Gnome Angel, which includes how to glue baste. If you would prefer to watch a video I suggest this one by Jen Kingwell and Fat Quarter Shop.

To get the papers for the block I simply printed the diagram (from the CD that comes with the book) and cut it up. Make sure your printer is set to 100% or not scaled, to check measure the whole block. The benefits of using the diagram rather than the templates are that you only need to print one sheet of paper, it's much easier to cut with fewer lines and you know it will still perfectly fit together!
There was no grand plan when it came to fabric selection, I chose a limited palette of navy, coral and mustard brown (is that even a colour?!) but knew I would add to it with whatever else I felt like. It wasn't until I actually got the book that I decided what I wanted to do. The letters really spoke to me. I'm sure that sounds very hippy but that's all right! I felt so moved and it is already my favourite part of sewing a block, it is enjoyable to meditate on the words while I sew.
I am choosing to read the letter and pick fabrics based on: the overall theme / a word or phrase that stood out or inspired me / the feeling provoked by the letter.
#12 Becky
Treat yo self! I included strawberries and a tape measure as a reminder to spend time on things I enjoy and to have little "goodies".

To make the most of these fabrics I did some fussy cutting (to select the part of the fabric I wanted for a specific part of the block). I did this the old school way by holding the fabric up to the light and pinning the paper on the back.

The beauty of sewing by hand and doing English Paper Piecing is that the blocks go together just as pictured. I like to think of it as a puzzle, you separate the components and then build the block back together.

For those final longer seams, or where you have points meeting, I like to use clover wonder clips to hold the pieces as I sew them. It really helps stops my hands from cramping.
#16 Bonnie
"The strong winds of trials and tribulations" was the perfect opportunity to use the Zephyr Gale print and the dandelions are to me a symbol to "look for the good side". Nature is out of our control but our own nature and how we handle life is within our control.

Again I built the block up step by step:

It is very easy to make a neat block when you English Paper Piece and everything lines up nicely.
Notes:
- I think it is worth deciding whether you want to have your blocks on point (as I am and as the author Laurie Aaron Hird did) or whether you will have them be square (as you see them in the block assembly part of the book). It makes a big difference if you are fussy cutting fabrics! Having said that, quilts that are used get seen from all angles so don't worry too much about it ;)
- While I was putting the blocks together I literally turned the book so it would be on point, this just made more sense to me and meant I was sure I was sewing the pieces correctly.
- I will be probably not English Paper Piece all the blocks, I would like to do some hand piecing as well and think that will be easier for the blocks that have more smaller pieces.
- Don't worry about mixing methods for the sew-along! If you would like to try and English Paper Piece one or more blocks you can easily gain back the seam allowance around the edge of the block when you remove the papers. Just be sure you add 1/4" around the paper when you baste your shapes. When you pull the threads out or unpeel the fabric the block will measure the same size as ones that are paper pieced on machine or hand pieced.
- I recommend thread basting if you know you want to English Paper Piece the whole quilt because it will last and you need the papers to stay in to sew them together.
- Glue basting is quicker. Since I am going to hand piece some and English Paper Piece the rest of my blocks (therefore don't need the papers to stay in) I will glue baste from now on.
- Hand sewing is always going to be slower than machine though. I'm happy with that, I enjoy the pace and find it relaxing. The sew-along is going to take a year and I don't need to rush it.
- Check out the English Paper Piecing tutorials back up there at the top of this post! If you have any other questions about epp or my blocks just leave them in a comment and I will answer you :)

I hope you find some of that useful and that you might be encouraged to try English Paper Piecing.
Head over to Oh How Sweet to see fellow guest blogger Melissa's blocks and tutorial!
Are you joining in the Farmer's Wife 1930’s Sampler Quilt Sew-Along? How are you piecing your blocks and are you trying anything new?
just plain human ~ Lily
Today I am again guest blogger for the Farmer's Wife 1930's Sampler Quilt Sew-along and I hope you won't be too disappointed with me.
Before I choose fabrics for each block of my 1930's Farmer's Wife quilt I always read the letter first, then pick fabrics based on the words / theme / feeling of the letter. When I come to write my blog post I read the letter again. When I reread the letter for block #51 Lily I had to laugh... it is titled 'Just Plain Humans' and it made me think about being 'only human'.
You see this is not the most polished of blog posts, I failed to get some great photos - actually I failed to get any photos of my progress at all because I have been sewing at night and I just relaxed into it. I don't have a special way of constructing this block and only a warning of bumpy backsides... I do have a pretty block though!
#51 Lily
I focused on the natural things the family enjoy; the "beauty of the wildflowers and the greening of the greasewood and sage" and the marvel of "lacy snowflakes".

Even my one good picture has a stray thread on it!
Notes:
- I do wish I had used the From Marti Mitchell templates for this block. All the small triangles and angled seams have caused a jumbled mess on the back and I found it really hard to press. The templates help reduce bulk a lot.

- When you are hand piecing small pieces that have mirror image shapes it is crucial to make sure you cut the correct number of each shape because they only fit together one way. I find it helps to lay my pieces on top of the diagram so I can keep track.
Despite the lumps I did enjoy sewing this block, I followed the block assembly in the book and came across no problems.
I hand pieced this block and I do have a hand piecing tutorial for you to show you my methods (at least I have something to offer!), click here for the tutorial.

I will be doing a catch up of my blocks soon as I have quite a few I haven't shown yet. Go ahead and subscribe to my blog to see more and there are other patterns / tutorials coming too!

happy discoveries ~ Martha ~ Farmer’s Wife 1930’s Sampler Quilt Sew-Along
Today is my turn as a guest blogger for the Farmer's Wife 1930's Sampler Quilt Sew-along with Fat Quarter Shop and Gnome Angel. I have made block #58 Martha.

Here's what I found trying the Flat Back Stitch for the first time:
⬝ Use tape! It really does help keep your seams straight. I used some washi tape and it worked really well.
⬝ My stitches are really tiny and close together, I did this when I started doing whip stitch too, I think it's my natural anxiety making me overly cautious.
⬝ It was slow. Again I was really slow when I started epp and, like anything new, I am sure I will speed up a little with practice (though all hand sewing is slow!)
⬝ It was tricky to sew together the sections, not being used to the stitch made joining the component parts together a bit difficult. I think this is just me getting used to a different way of doing it and finding out the best way to jiggle those points to meet.
⬝ You really can't see the stitches from the front!! This is a huge bonus for me, especially when my epp blocks are going to sit with my hand pieced blocks. You can't see the stitches on my hand piecing blocks either but the ones I have whip stitched you can. Now I'm not saying that's a bad thing, after all it is handmade work but it is satisfying to have them be invisible.
⬝ I have only made one block but the stitches seem strong. I have tried doing ladder stitch and variations before but felt the stitches didn't hold up as well as whip stitch. The flat back stitch does in my opinion.
I am going to make more blocks using this stitch, I would love to get quicker and the end result really impressed me!
#58 Martha
This letter is all about the "delightful memories" of being raised in the country. I chose the lighter brown fabric to represent the "cool dust pushing up between my bare toes", the brighter fabric in the centre for "bursting a red-ripe watermelon over my knee" and the mellow dots for "turning somersaults into the deep, fragrant hay in the newly filled mow".
This letter is all about the "delightful memories" of being raised in the country. I chose the lighter brown fabric to represent the "cool dust pushing up between my bare toes", the brighter fabric in the centre for "bursting a red-ripe watermelon over my knee" and the mellow dots for "turning somersaults into the deep, fragrant hay in the newly filled mow".

One of the aspects of quilting that brings me so much joy is trying new things! I really enjoyed making a block with this new stitch and learning a different way to epp. If you try it please let me know what you think!
The Farmer’s Wife 1930s Sampler Quilt: Inspiring Letters from Farm Women of the Great Depression and 99 Quilt Blocks That Honor Them by Laurie Aaron Hird for Fons & Porter/F+W; RRP $28.99 – Click here to purchase.
pieceful ~ Golda ~ Farmer’s Wife 1930’s Sampler Quilt Sew-Along
Today is my turn as a guest blogger for the Farmer's Wife 1930's Sampler Quilt Sew-along with Fat Quarter Shop and Gnome Angel. I have made #38 Golda and I really love this block design!

I enjoy the simplicity of choosing just a few fabrics for each block. I pick my fabrics based on the theme of the letter so that always influences my choices and allows for some interesting combinations:

Two Liberty prints and Fan Dots in Brown, Mostly Manor by Victoria Findlay Wolfe.


I enjoy the simplicity of choosing just a few fabrics for each block. I pick my fabrics based on the theme of the letter so that always influences my choices and allows for some interesting combinations:

Two Liberty prints and Fan Dots in Brown, Mostly Manor by Victoria Findlay Wolfe.
For this block I decided to do English Paper Piecing and the piecing was fairly simple, following the block assembly instructions in the book.
The only tricky part is the points of the triangles, particularly on those longer, thin ones. I found it easier to fold over the top seams of the triangle first and then the bottom part - it really helped to prevent loosing those corner points:


There were quite a few little triangle pieces in this block but it does come together easily and I think it is a striking design.
#38 Golda
This letter follows the same theme as a few others in the book and focuses on the joys of farm living. I often decide to use brown in the blocks where farming is a focus. This particular print is gorgeous and I love how it has little bits of other colours in too. I used the pink Liberty pink to represent the fact that they "make a garden" and the green Liberty because "the grass never before was so green".

The pops of pink in each print really make me very happy! The back side is a little messy with all those dog ears but since it's a small block I'm just pressing them any which way and I'm not worried about it!


Have you made this block?
If you want to join in the sew along, click the links below to purchase the book and join in the sew along - it's never too late!
The Farmer’s Wife 1930s Sampler Quilt: Inspiring Letters from Farm Women of the Great Depression and 99 Quilt Blocks That Honor Them by Laurie Aaron Hird for Fons & Porter/F+W; RRP $28.99 – Click here to purchase.
deceptive ~ Anne ~ Farmer’s Wife 1930’s Sampler Quilt Sew-Along
It started badly. When I looked at the block picture next to the letter I thought there were only two fabrics. I spent some time choosing two fabrics, then happened to look at the block assembly and realised there were three! I chose my fabrics based on the theme of the letter so I had a rethink and finally felt happy with my picks:

top to bottom: Delicate Femme in Apricot, Rapture by Pat Bravo; Carpal Stone Grid in Gold, Carkai by Carolyn Friedlander and Row by Row Lit, Cultivate by Bonnie Christine.
And then it just went downhill!
I decided to hand piece this block, the last few were English Paper Pieced but I needed a change. Perhaps because I had been used to just cutting up the pieces, or maybe because I wasn't concentrating, I messed up. I failed to realise that the triangles in the centre are not all the same size or that this is a mirror image block. And it wasn't until I started sewing that it all clicked.
I salvaged what I could and then re-cut the pieces. Very often a block spinning the wrong way wouldn't bother me at all but I do like getting it 'right' when I can. Also by this point I was questioning everything and relying heavily on the block assembly to keep me in check!
The easiest way for me to make sure the pieces are correct in a mirror image block when hand piecing, is to print the block diagram and trace the lines on the reverse. I use a lightpad, put the diagram face down and then the fabric right side down on top - turn the light on and trace.

So finally I had the pieces cut out properly! The block can be split into quarters, as each quarter is the same. I laid out a quarter to ensure it was right then split the block into eighths and used clips to hold the pieces for each small section together.
I must have looked at the block assembly a million times while I was sewing and it really isn't that complicated!! I think I just started doubting myself because I screwed up the cutting. My brain probably needed the challenge ;)
Usually I do know what I'm doing and you can find my hand piecing tutorial here.
Even with all the mistakes I made I did enjoy sewing this block together!
#5 Anne
This was a beautiful letter, I like how often the letters tell of simplicity and finding joy in what we have. I also found the book The Culture of Simplicity by Malcolm McLeod, that is quoted in the letter - you can read it online here (there are sections missing but it is free). You need to click the Next>> tab on the top right to flip through the pages.
I used the grid print to represent the "rolling brown fields" and the floral print as a symbol to "Live simply then. Enjoy the present moment". The stripe worked beautifully as "the beams that bring summer into the soul and make us lighthearted, free and glad".

I'm already working on my next block and getting back into the swing of it! Are you sewing along? How many blocks have you completed so far and which block is your favourite?
The Farmer’s Wife 1930s Sampler Quilt: Inspiring Letters from Farm Women of the Great Depression and 99 Quilt Blocks That Honor Them by Laurie Aaron Hird for Fons & Porter/F+W; RRP $28.99 – Click here to purchase.
hand piecing a quilt

I am going to show you how to hand piece patchwork, this is my favourite method for making my 1930's Farmers Wife blocks. It is great for small pieces of patchwork, perfect for 'on the go' sewing or relaxing on the sofa sewing!
Please read through the whole tutorial before you begin and if you already do hand piecing then leave a comment with any extra tips you have, I enjoy hearing them! This isn't a tutorial for a particular block, I am just showing part of a block I made in order to demonstrate how to hand piece and how to build your patchwork.
To begin hand piecing you will need templates or a printed version of your block. For the 1930's Farmer's Wife quilt I print out the diagrams from the CD. I am fortunate to have a LightPad, which I use to trace the lines on the diagram onto fabric (in the same way you would trace an embroidery pattern). You could use cardboard, freezer paper or acrylic templates to draw around.
My five top tools for hand piecing are:
1. 1" x 6" ruler - perfect for tracing and drawing smaller shapes
3. black Frixion pen (and I was excited to discover recently you can get refills!)
4. a long thin needle
5. a quality fine cotton thread, I use Aurifil 50wt.

I prefer to use the water erasable pen most of the time but if it doesn't show up on a blue or dark fabric then I use the frixion. As you are drawing on the back of the fabric the black always works well even on very dark fabric but I can't bring myself to use it on white!

Once you have drawn your shapes onto the fabric you need to cut them out leaving at least 1/4" around each side. I often use scissors for this step but for the 1930's Farmer's Wife I have the From Marti Mitchell templates, which allows me to rotary cut. I like using them for triangles, that's why you might notice the corners have been cut off the triangles in this tutorial.
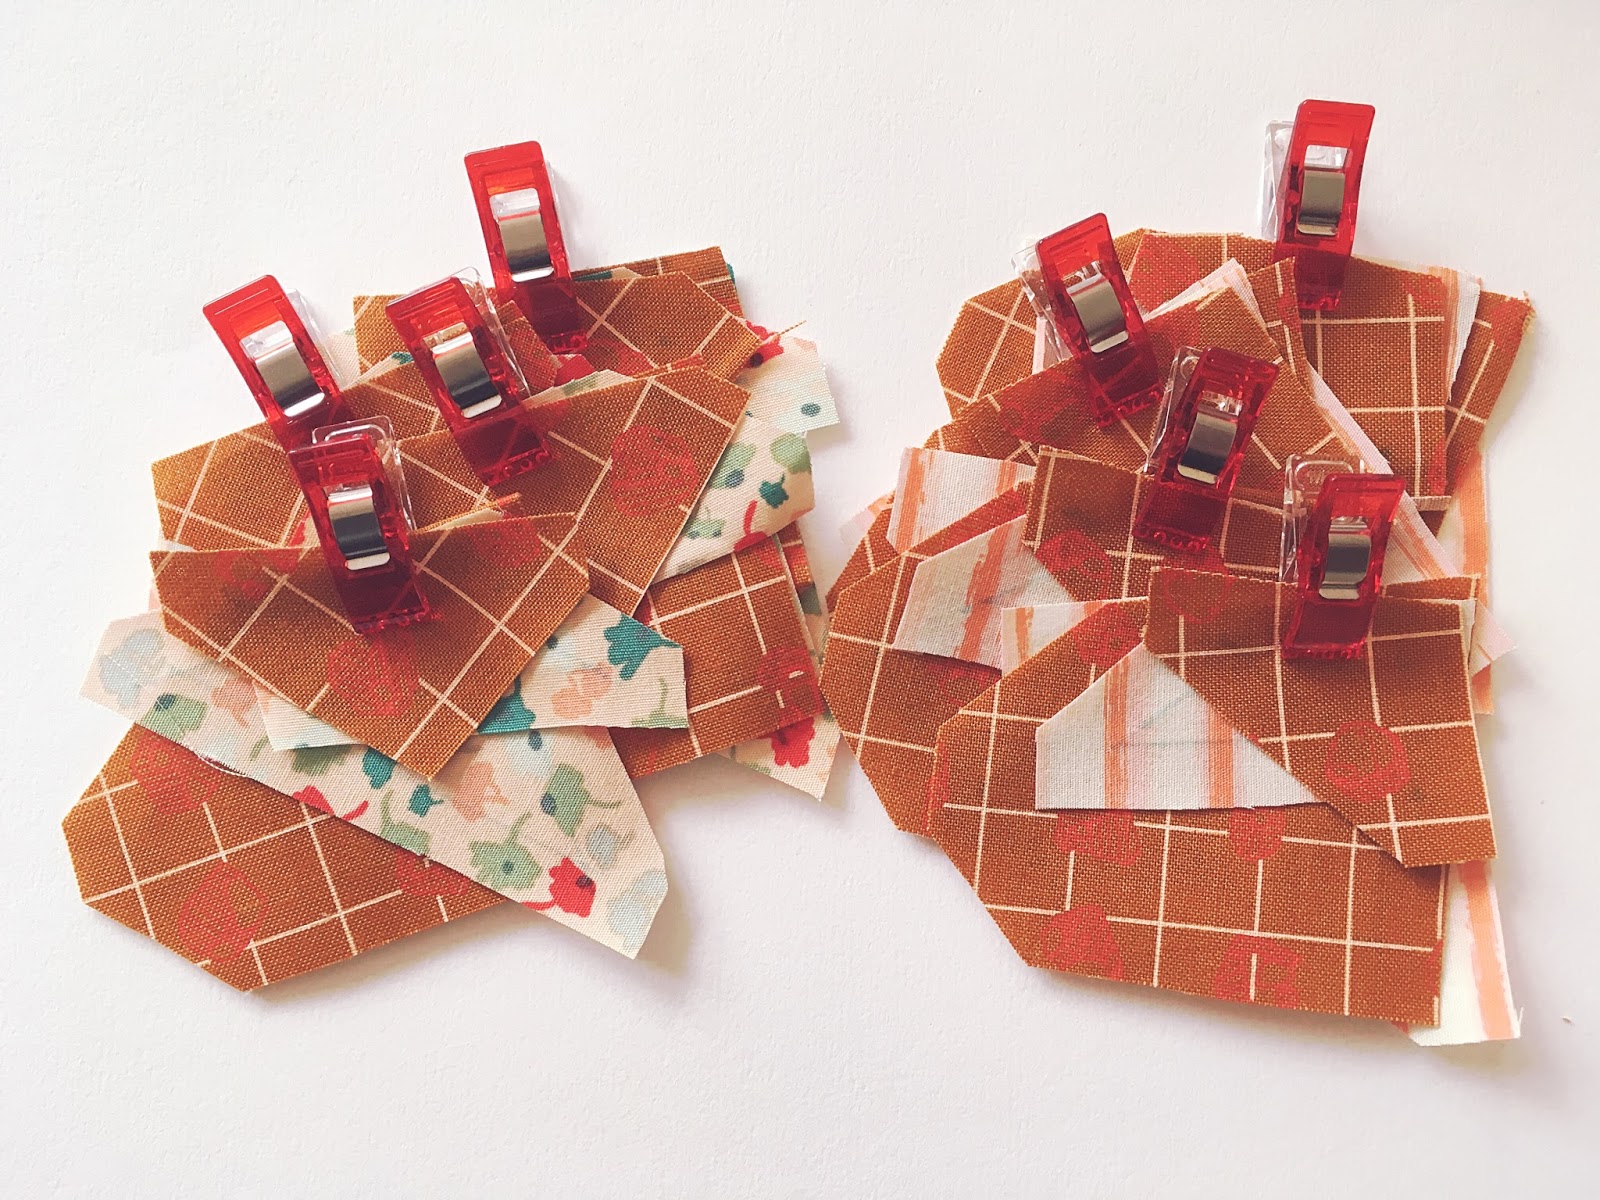
Preparing the pieces for sewing is probably the most time consuming bit and my least favourite part, so I try to get two or three blocks ready for sewing and keep them in small zip lock bags.
Preparing the pieces for sewing is probably the most time consuming bit and my least favourite part, so I try to get two or three blocks ready for sewing and keep them in small zip lock bags.
So you have your shapes cut out and you want to start piecing them together now. I recommend referring back to the pattern at this point to ensure you have the right placement of your pieces and check the order in which you need to sew them together.
Take the first two pieces and place them right sides together, make sure you focus on which line needs sewing - it is really easy to sew along the wrong line (I have done that more times that I would admit!). You might find it helpful to use a clip or pin to indicate which side you are sewing.
Take the first two pieces and place them right sides together, make sure you focus on which line needs sewing - it is really easy to sew along the wrong line (I have done that more times that I would admit!). You might find it helpful to use a clip or pin to indicate which side you are sewing.


Thread your needle and tie a knot at the end of the thread. Put your needle through the corner on the line and come out at the corner of the other piece. At first this might seem tricky, if you find it hard then just do one side at a time, push the first fabric further down your needle and the wiggle the needle around to come out in the right place on the other piece of fabric. You want to be as precise as possible to make sure you are starting at the end of each line (in the corners).
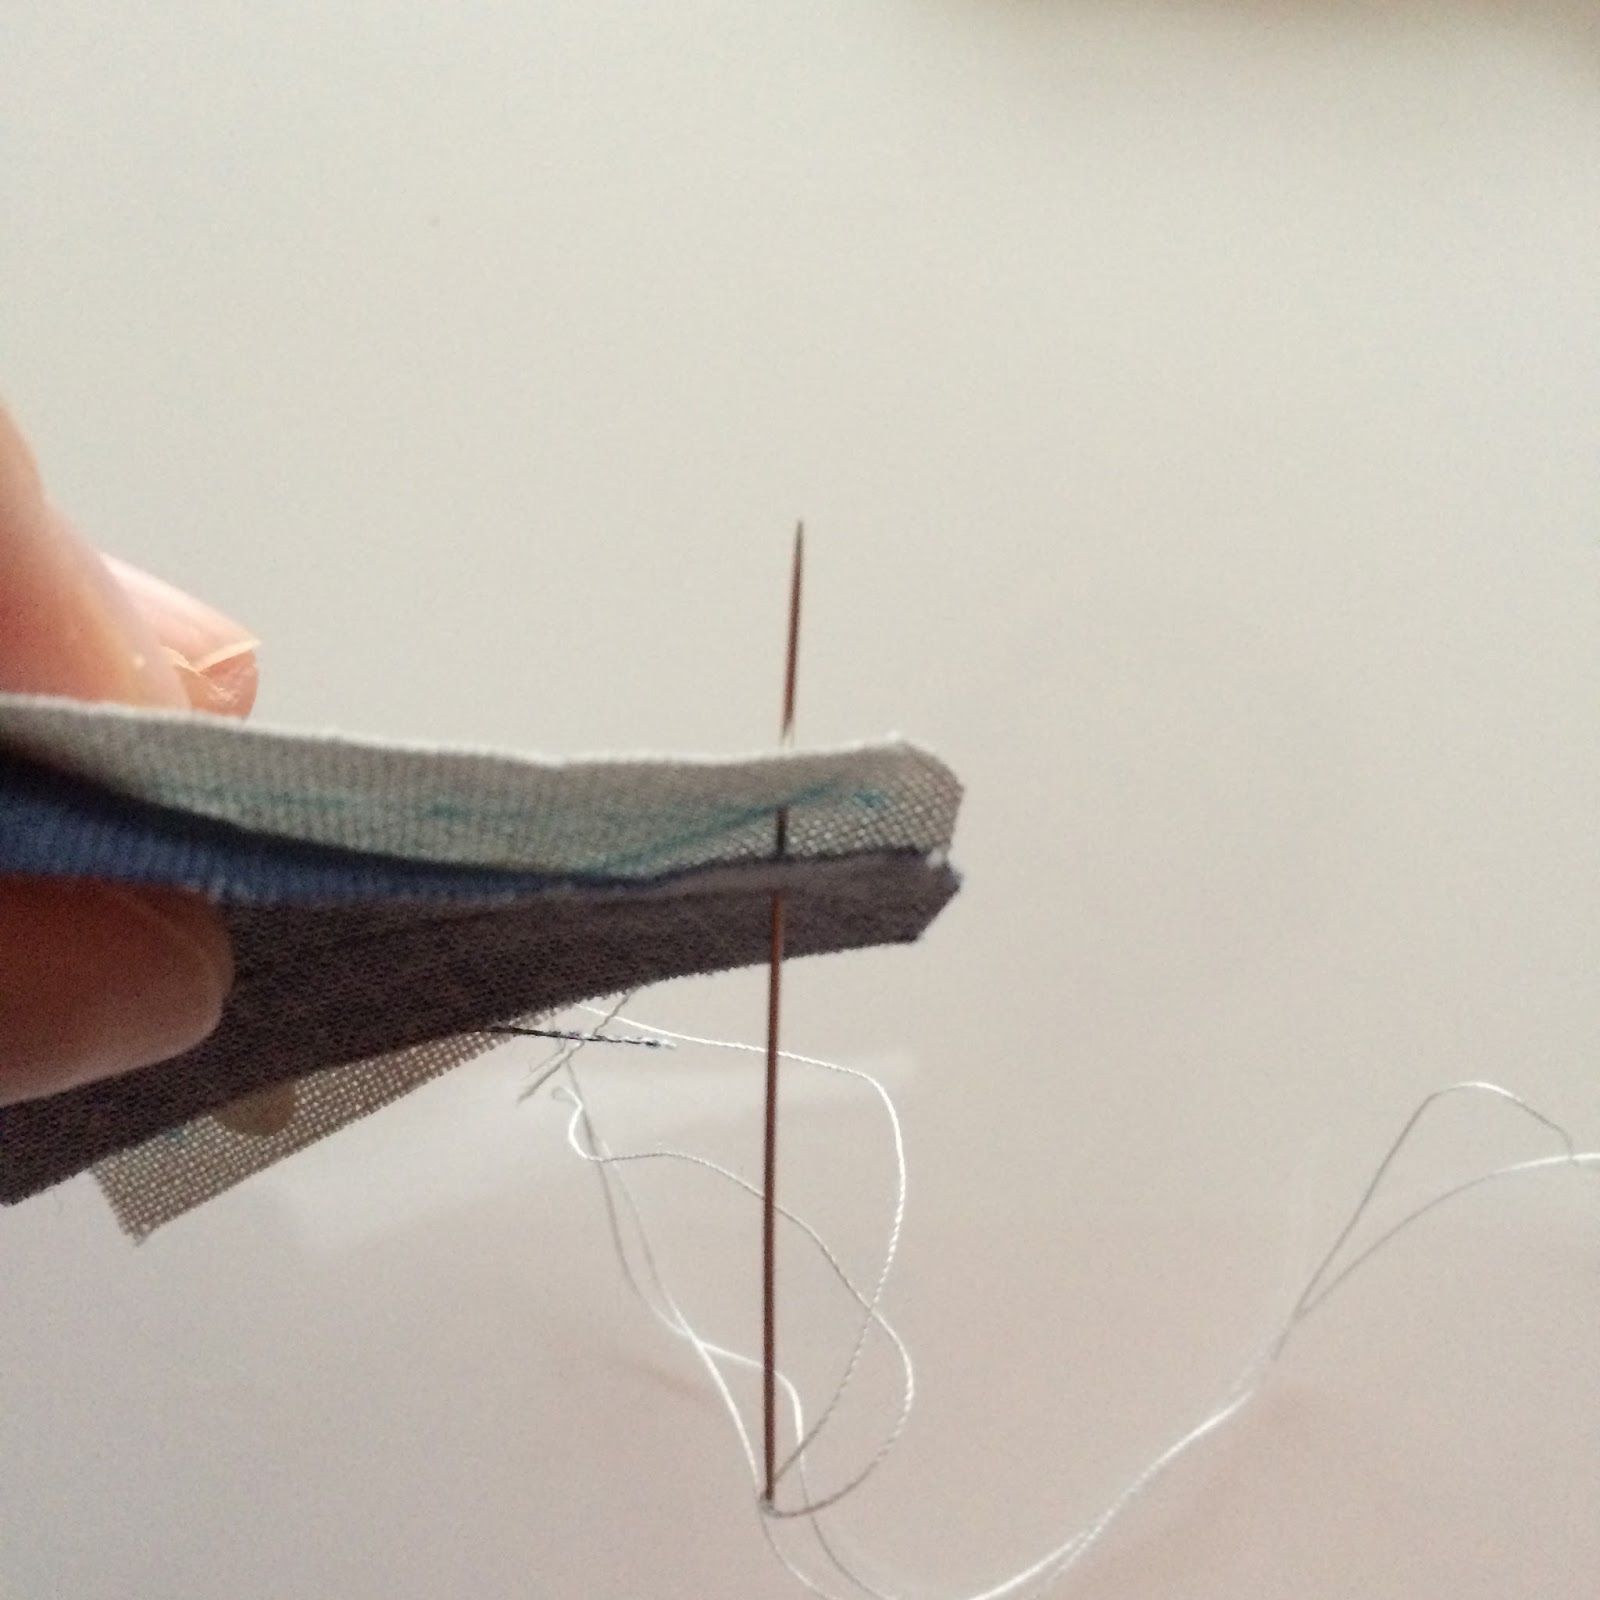

Make a small stitch and once you pull that through do a little backstitch to secure it. Then begin a simple running stitch, you can do one stitch at a time, load a couple of stitches on your needle, or more than a couple if you feel comfortable.


Every few stitches (about every 1-1.5") you should do a backstitch. This helps secure your work. Having had to do some unpicking I can tell you that it does work so it's good to remember and will make your quilts stronger.
As I sew I look at the front and the back of the line of stitching, it's important to keep checking you are straight and on the lines so everything matches up.


Once you reach the end, backstitch and then tie a knot.

So that's one piece done, now you need to add another piece. Here I have joined two half square triangle blocks.
Treat it just the same way, sewing one piece to the other. When joining corners that already have a seam, try to get your needle in the middle, right in the corner, so your points will match nicely.


I repeated those steps and now I have two sections that need joining...

Before I begin stitching I use wonder clips to hold the final corner and the middle seam (I work right to left so keep that in mind if you work left to right!). This means they will stay in place and line up when I reach them.

I begin sewing in the corner (on the right in the picture above) and stitch all the way to the middle - backstitching occasionally if needed. Once I reach the middle I make sure my seams are moved out of the way and then do a backstitch. You do not sew through the seams, you need to keep them out of the way!

To get past the seams I either sew diagonally through the centre of the seams or pass through the seams on one side. Basically you want to start stitching on the other side of the seams without sewing them down.

You want to come out at the corner of your next line:

Then do another backstitch and continue sewing:

When you reach the end be sure that your corners line up so the needle is passing through the corner on each side. Finish with a backstitch and knot.

Keep sewing your blocks together until you are done! I do not press my seams as I go along, mostly because you need to move them as you are sewing, I just give them a good press once I finish each block. If you are joining sections together to make a larger block you could press each section before you put them together to make it less fiddly. I let each block dictate which way to press and try to reduce the bulk as much as possible, whether that means pressing some seams open or make spinning seams - see Cassandra's helpful tutorial here.

EDIT: click here for more tips on block construction for hand piecing!
I hope you find this tutorial useful and are encouraged to try hand piecing. I will try my best to answer any questions if you leave a comment below and you are welcome to share any tips or advice too. Happy hand sewing!
My thanks to Helen for all her great advice and for helping me start hand piecing :)
Subscribe to:
Posts (Atom)