dots
Showing posts with label dots. Show all posts
fabric perfection and winner!
I love finding perfect fabric, you know the prints you get super excited about?! The ones that just make you smile because you love them so or they are perfect for a particular project.
I squealed when I got this lot I ordered from the Fat Quarter Shop:

Red Check, Bunny Tales by Darlene Zimmerman; White Peony in Violet, Walk in the Park by Maywood Studios Fabrics; Bouquet in Cream, Walk in the Park by Maywood Studios Fabrics; Geo Calico in Glade, Franklin by Denyse Schmidt; Circle Square in Glade, Franklin by Denyse Schmidt; Gold Hearts, Dress Me for the Playground by Wee Gallery and Firefly in Whisper, Hello Bear by Bonnie Christine.
I adore those florals and if you're a fan of 1930's reproduction fabrics you should look at the whole line of Walk in the Park - there are some really cute prints!
Dots are a tricky thing, I love them but they have to be 'right' for me. I like pin dots and medium dots and different variations but there is something about this Firefly print that is really special. I like the randomness and it's a perfect background or low volume print:

I also scored some nice fat quarters in the Fluffy Sheep Quilting sale this week - there are lots of great fabrics on sale (no discount code required) so check it out!

Darts in Watermelon, Minimalista by AGF Studio; Delicate Femme Apricot, Rapture by Pat Bravo and Hexa in Noir and Turquoise, Minimalista by AGF Studio
I have projects in mind that these are totally perfect for!
And then finally while I was working at Patchfinders I couldn't resist buying some of this clover and bee print. I have been totally drawn to it, I think it somehow reminds me of my childhood and I will be adding this to my green tea and sweet beans quilt fabric stash! Also it was £3 for 1/2 a metre so why not?! I also got some Best Press, I have never tried it but found my usual supermarket starch was leaving marks and flaking so hopefully this stuff is better.

Nature's Song by Punch Studio for Hoffman Fabrics.
I'm working on the Baby Carriage Flowers block from Green Tea and Sweet Beans. I realised I have sewn one of the background pieces back to front (that's what you get for late night sewing without decent light) but I couldn't face unpicking after hand sewing those curves so it will have to stay. Just have to add the corner pieces and this block will be done:

Today Joan and I made some mittens for her costume for the upcoming World Book Day and having taken a picture the little one wanted to have hers taken too!


Thank you to everyone that entered my 1,000+ followers giveaway, the winner is...


Congratulations Jenny! I have sent you an email :)
Linking up:


dots ~ le challenge ~ printed jersey scarf
This months challenge was to create something with a 'dots' theme and it was the perfect opportunity for me to make a jersey scarf, which I have wanted to do for a while.
I ordered 2.4m of 64" wide cream jersey and a pot of Dylon Fabric Paint in Gold from Minerva Crafts. I wanted to make a long scarf so it could be worn in lots of ways, wrapped round a couple of times in winter and as a shawl for those cool summer nights.

I started by cutting the jersey in half lengthwise (which means I also get to make another one!) and ransacked the house for things to use for printing. I have seen a couple of tutorials that use corks so I grabbed one of those, I had a spare foam mini roller refill (the kind for painting walls) and then some random toys that had fun shapes...
.jpg)
I cut a test strip from the extra fabric and had a play:

This is well worth doing if you plan to make your own. Some shapes looked good the first time but subsequent stamps not so great. I didn't like the cork at all (on the right) and the wooden shapes looked cool but not neat enough. The plastic bobbin made such a great shape (reminds me of the steam punk pattern) but wasn't what I wanted for this scarf. I loved the pizza shape made by the watermelon and that led me to cut the end of the foam roller, a really simple way to make your own shape!

You have to cut away the foam quite far down so that it doesn't ruin the shape when you press down. A did a few tests and made a triangle shape. I practised dipping it in the paint and printing a couple of times. Turned out I preferred to dip it in the paint every time I stamped so that I got a really good amount of paint each time. I also pressed down lightly and sort of rolled the stamp around so it created a nice shape. If it didn't work out I just went over it!

So I was happy with the triangles but the theme is 'dots'!! I didn't want to use the cork and everything else seemed too big... then I had a revelation and grabbed one of my kids pencils, the rubber on top was perfect!

Here's my printing station (aka dining table), the laminated table cloth was perfect and I didn't use anything else underneath (you could use newspaper if you want to protect your floor, table etc). You can also tell I didn't wash or iron the fabric before starting, I'm reckless like that.

It's hard to see in the photos but the gold Dylon fabric paint has a beautiful shine to it in the light. Once the paint was dry (after about 4 hours) I used a cloth over it and set the design with a hot dry iron. It did feel a bit stiff but a quick cool wash softened it up and I threw it in the tumble dryer (not sure if you are supposed to but it was fine!). It really is the most snuggly scarf and I'm thrilled with the design. The dots make it a bit retro and the triangles look 80s but the gold keeps it modern.

I adore jersey. It's so easy to wear and the fact it just rolls up at the edges so you don't have to sew it means it's super easy to make your own scarf! Minerva Crafts stock great wearable colours of this jersey and you can order in quantities of .10m (minimum .5m), perfect to get the right length of scarf for you.
Here's some bad selfies of me tying it in different ways:

I love my new scarf!! And this is the first tick off my FAL list :)
If you have made anything with dots or dot themed in the past month come and link up your finishes at le challenge for a chance to win a $25 gift certificate to the Fat Quarter Shop

S is for Stitch quilt and an easy border tutorial
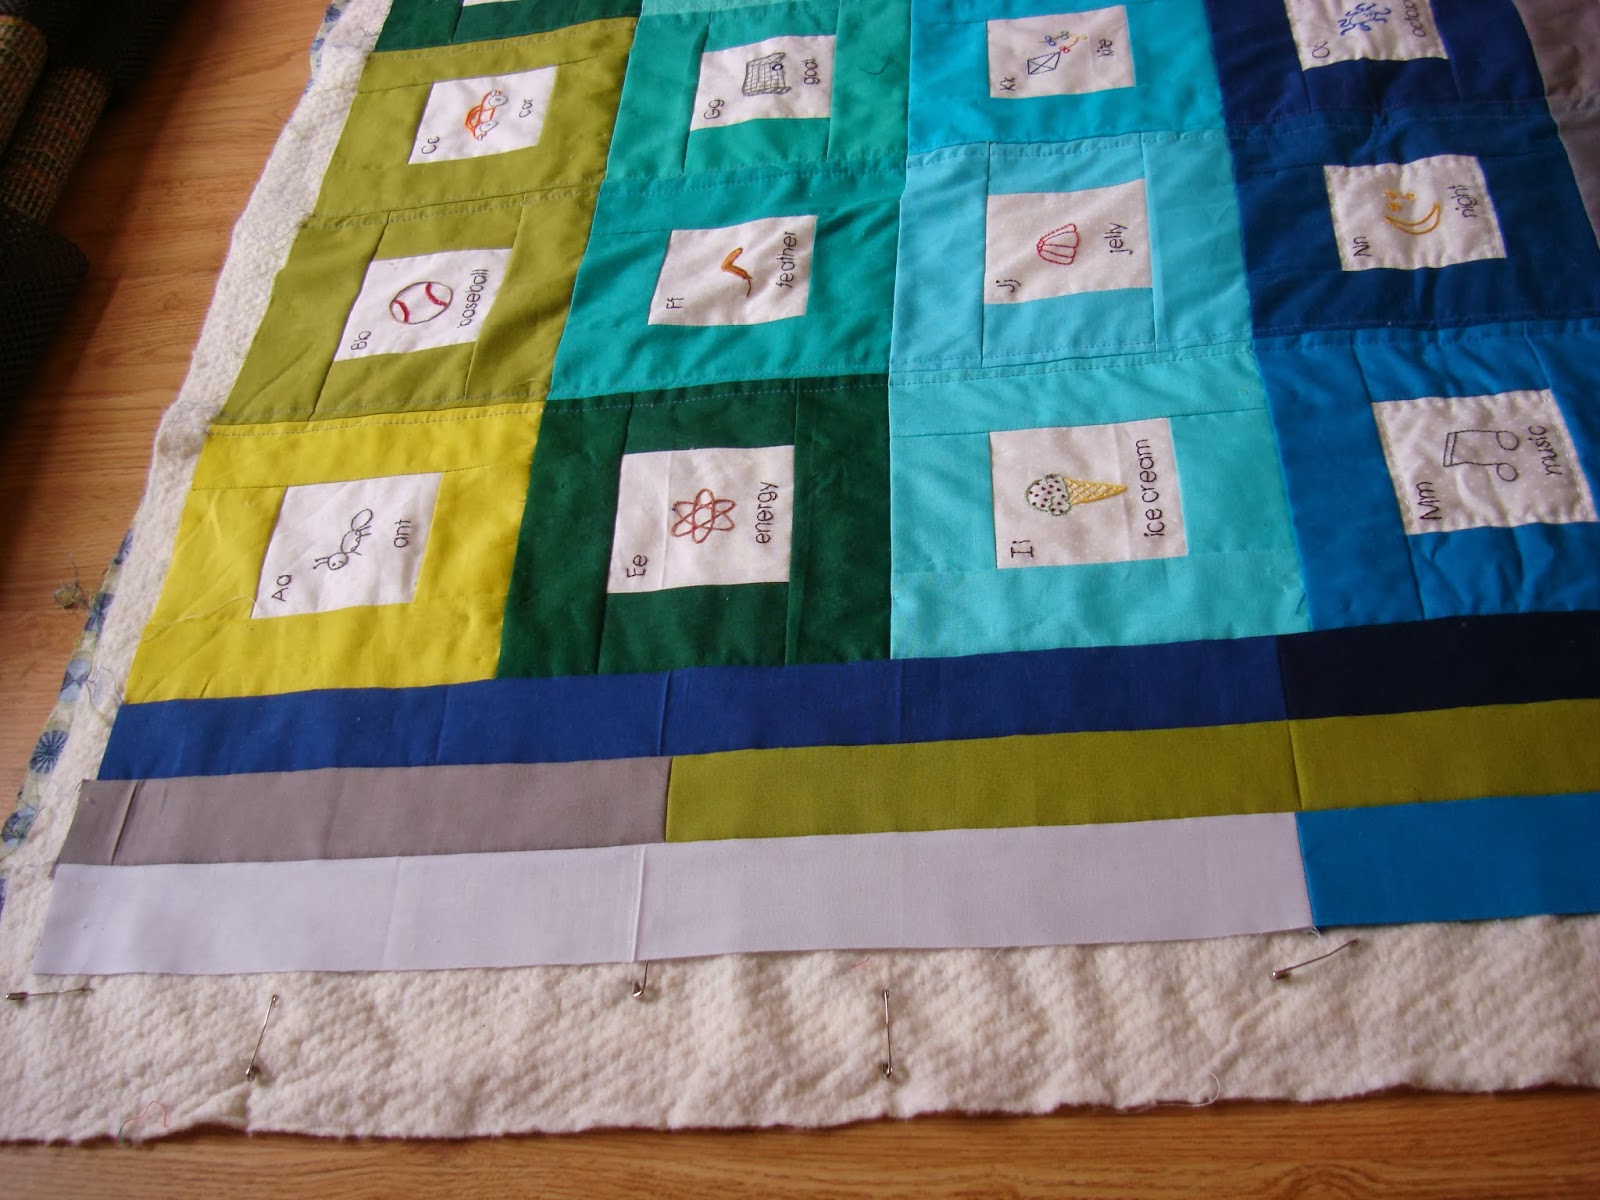
This is my first quilt finish of the year and I'm hoping to set a precedent of making quilts that I'm really proud of and love. I made this quilt for my dear friend's new baby boy.

It features cute embroidered panels from the book S is for Stitch, though the tree is from Doodle Stitching: The Motif Collection and the jelly and pineapple were my own little doodles.


The embroidery was stitched on the absolutely gorgeous Lakehouse dots in white on white, such a great fabric to have in your stash. I made the embroidery into blocks using a Summer Kona Roll Up, I had enough from one roll to make all the blocks, borders and binding and I still have the yellows, oranges and pinks left over. That little roll goes a long way!
The backing fabric is Taffy in Indigo, Prince Charming by Tula Pink and it ties in perfectly with the Kona shades.
All pieced with my trusty Aurifil and straight line machine quilted with Aurifil 50 wt 1128 - a perfect medium shade of blue. I also hand quilted each block in white perle thread:


I embroidered a label (the photo is cropped to protect the identity of the baby in case anyone wants to steal the quilt) and used a simple running stitch to attach it to the back:

This completes another project from my FAL list.
Here's a quick border tutorial...
Once I had the blocks arranged I realised I would need to make the quilt wider and the left over roll up strips were the perfect answer. I pieced them into long enough strips and was about to sew them to the quilt top when it occurred to me that it would be much quicker to 'quilt as you go'.
You need to baste the quilt with the backing and wadding wider than the quilt top, and also pin the area that doesn't have the top on it - basically just pin the backing to the wadding so it stays put when adding the borders. This picture was taken after I'd sewn the right hand border but you can see how I made extra space on the left:
 |
| these pictures were taken as I was sewing, please obviously make sure your quilt is nice and flat when basting! |
Then pin the first strip to the quilt top, right sides together:

and sew it using a 1/4" seam allowance:

Then flip the border over and press (I finger pressed but go ahead and use an iron if you want to). Pin the next strip to the first border strip, right sides together:

Sew it down, flip and press again and then repeat with the final strip:

And there you have it, a simple way to add a border. You can quilt on top of it if you chose to. I left it as it was but if the strips were wider than 2.5" (the width of roll ups and jelly rolls) then I would have quilted the border to give the fabric on top more stability.

The quilt measures approx 40" x 56" so there's plenty of growing room for the little one and hopefully as he gets bigger he will enjoy all the little pictures. Thankfully his mum and dad love it!

Red and white
I have a stash of red fabric that I had been collecting for a different pattern but since that's got pushed down the list I decided to break it out for the Classic Meets Modern QAL. I also had some of the lovely Lakehouse dots left over from my S is for Stitch quilt blocks so I decided to use that for the background.
I remember Janine mentioning about making a red and white quilt and I loved the idea of using that classic colour combination for a sampler quilt.
So here's my first block the Polar Bear Paw:


I remember Janine mentioning about making a red and white quilt and I loved the idea of using that classic colour combination for a sampler quilt.
So here's my first block the Polar Bear Paw:

The red fabrics are: centre - Voltage Dot in red, Chicopee by Denyse Schmidt; main paw - Charles in rich red blue, Bloomsbury by Liberty Lifestyle; claws - Scrolling Ditzy in orange, Daisy Mae by Denyse Schmidt (this is possibly my favourite print ever... or one of them!).
Looking forward to seeing what February has in store!
Head over to Erin's if you'd like to join in:
Subscribe to:
Posts (Atom)