piecing
Showing posts with label piecing. Show all posts
Inspiring Improv 🐠 Shoal
For some people the idea of improvised piecing is scary. The thought of stitching bits of fabric together with no pattern or precise measurements can be overwhelming. Others find it liberating and exciting. Honestly I probably find myself somewhere in the middle. Improv quilts look really cool but how do you do it?! No measuring, no rulers, no real idea of how it will turn out? That might feel unnerving but it's also a LOT of fun. Letting go of expectations a bit, relaxing the rules and creating something completely unique. Truthfully in a world where there is a lot of pressure, where social media presents ideals and things can sometimes become a little samey; improv is like a breath of fresh air.
A while ago I might have said it's not really for me, I've had a go and enjoyed it but it didn't click. Until now. Having seen Nicholas Ball's trunk show at the Sewcial Retreat I knew a bit about his techniques and was really inspired by his quilts. When he invited me to join his Inspiring Improv Book Tour I was delighted, intrigued to discover more about his process and learn. Nicholas' new book is full of the techniques he uses presented in a way that's fun to read. It's like he's talking to you as he shares the inspiration and stories behind the amazing quilts and has great tips that teach you how to create your own improv versions of his designs.

I chose to follow the Shoal pattern and make some fish. Above you can see Nicholas' quilt and how beautiful the photography is in the book.
My make is not a quilt but a cushion cover. As it's going to live with us I had to steer away from using blue because it wouldn't fit our decor (though fish mad Joan will probably steal it away to her room anyway!). I picked out background fabric while at Patchfinders recently, I could not resist the shot cotton. It's a mix of purple and mint, photos can not do it justice sadly. Because I can never restrain myself I also got the stripe, text and watercolour pink fabric too. I added another pop of bright colour with the yellow woven, Chartreuse Mariner Cloth by Alison Glass.

Once the fabric pull was made cutting could begin!
Pineapple Crush Quilt ~ Aura Blog Party 🌺

Mister Domestic invited me to his Aura Blog Party and I was like, "woaaaah.", and then saw the fabric and I was like, "woaaaah." and then it came to me that this would make the perfect pineapple quilt, "woaaahh..."

So this is my ode to Mr Crush Turtle, with turtles swimming through the denim water and geometric coral reef! A tropical blend of modern and traditional, this quilt is simultaneously structured and choatic. The clean lines of the pineapple blocks and the way I've placed the colours makes for a striking layout yet the prints themselves are scattered throughout in a random way.

I'm going to share some tips about making pineapple quilt blocks, why I used NO pins when piecing and (over)share the process of making my Pineapple Crush quilt!
Pineapples and Paris Star quilt
It's been sew sew sew at my house! These projects each have a lot of seams and used up a lot of thread. Completely worth it though because they turned out really nicely.
My first project used the new Bird Pond collection in Blue and Teal by Tilda. I made two sizes of pineapple blocks for a 20" cushion front (which I did make into a cushion but I don't have a picture of the finish!). I chose to fussy cut the gorgeous Anemone print for the centre of the largest block and for the corner squares.

Surrounded by smaller blocks like this, it looks like ripples on a pond. The blocks were made using the Creative Grids Pineapple Trim Tool, both the larger (for the 10" centre block) and mini version (for the eight 5" blocks). It makes it so easy to create really accurate, straight seams for what is otherwise a fiddly block. Someone messaged the show to ask if you could foundation paper piece these blocks, of course you can and a quick google search showed up plenty of free patterns you can use. Personally I prefer using the tools, it really is so simple once you get in the swing of it - just be sure to follow the instructions! I have made errors myself though those blocks still turned out nicely, they just weren't pineapples! I also think this is a brilliant way to use up scraps and like that you can create so many different layouts playing with fabric placement. You can see my 'mistake' blocks and another version of the block I made during the demo, video at the end of this post.

My other project is a quilt top made using the fabulous Paris Star pattern by Lynne Goldsworthy. This is such a stunning design and Lynne's instructions are excellent as always. I really like those half stars and the way they disappear into the border. It's a fairly big quilt finishing at 70" but the piecing isn't complicated.

Here is lovely Vicki (and her beautiful princess hair) with a ta da moment after director Tim did a great job of hanging the quilt top in the studio. Not as easy when it's a flimsy that's larger than the angled wall!

There are lots of points to match while making these stars but I showed a couple of tips during the demo that should help. The four blocks that make up the quilt come together fairly quickly and the borders are simple, perfect for some fancy quilting if you wanted to. This is definitely one of those designs that looks slightly terrifying but once you've made it you want to make another!

If you'd like to see the demos click below - the Pineapple cushion starts at 1:05:00 and the Paris Star starts at 3:04:00 - you could watch the whole show and see Becky Alexander Frost demo bag making!
half circle scallop trim ✽ a mini tutorial
I was given a beautiful low volume nine patch block that I wanted to turn into a cushion. After spending a long time thinking about it, I was inspired by the Glam Clam quilts on social media. This is made from circles rather than clamshells and they are so tactile, like rounded prairie points.

They are really easy to make!

Decide on the size of scallops you want to fit your project, find something circular with a diameter of that size (like tape or a cup or plate). Cut fabric squares large enough to draw circles and leave a 1/4" seam all the way round. For each scallop you need two pieces of fabric. You could use muslin or something plain for the back if you prefer.
Draw a circle on the back of one of the fabric squares and place on top of another square so that the right sides are together. Pin in the centre.

Sew around the drawn line. For larger circles this is quite easy, just gently turn the fabric as you sew. Smaller circles will require more stopping and starting to make sure you are sewing on the line.

Trim around the circle using pinking shears. This helps you have nice curves :)


You now have two scallops. Turn right side out and give it a good press with an iron.


My scallops were 4.5", to stop them from folding in on themselves or getting lumpy, I top stitched around the edges for stability.
Decide on your placement and then layer scallops right sides down, so the outer edges line up with the edge of the block. The floral scallops you see peeking out below will actually be at the front after sewing:

Place a border strip right side down over the top, lining up the bottom edges:

Pin it all in place and sew using a 1/4" seam. You might want to use a quilting needle (rather than a piecing one) in your machine because there are a few layers of fabric there.
Now I have to admit to a mistake you may have already spotted. By sewing on the borders I cut off some of my scallop edges! To avoid this you could just move the scallops 1/4" away from the edges on the first two rows you sew on the cushion. It doesn't bother me enough to redo it. I actually think it might work to stop the scallops sticking out from the cushion so much when it's stuffed!

I'm going to enjoy ruffling these!
hexie label wonder clips ~ The Reset Girl Giveaway!
**Giveaway now closed**
I was cutting out lots of pieces for a quilt the other day and realised I needed to keep track of them, my usual way of doing this involves post its, scraps of paper and pins or separate zip lock bags. None of these are particularly efficient and, let's face it, not at all cute.
When I'm doing English Paper Piecing or hand sewing I always use Clover wonder clips to hold my pieces together and they work really well. Far less fiddly than pins and a better grip than post its! It makes sense to use them for my rotary cut pieces too. I considered writing on them with a Sharpie until I remembered that I did that on my ruler and rotary cutter and it wears off pretty fast.
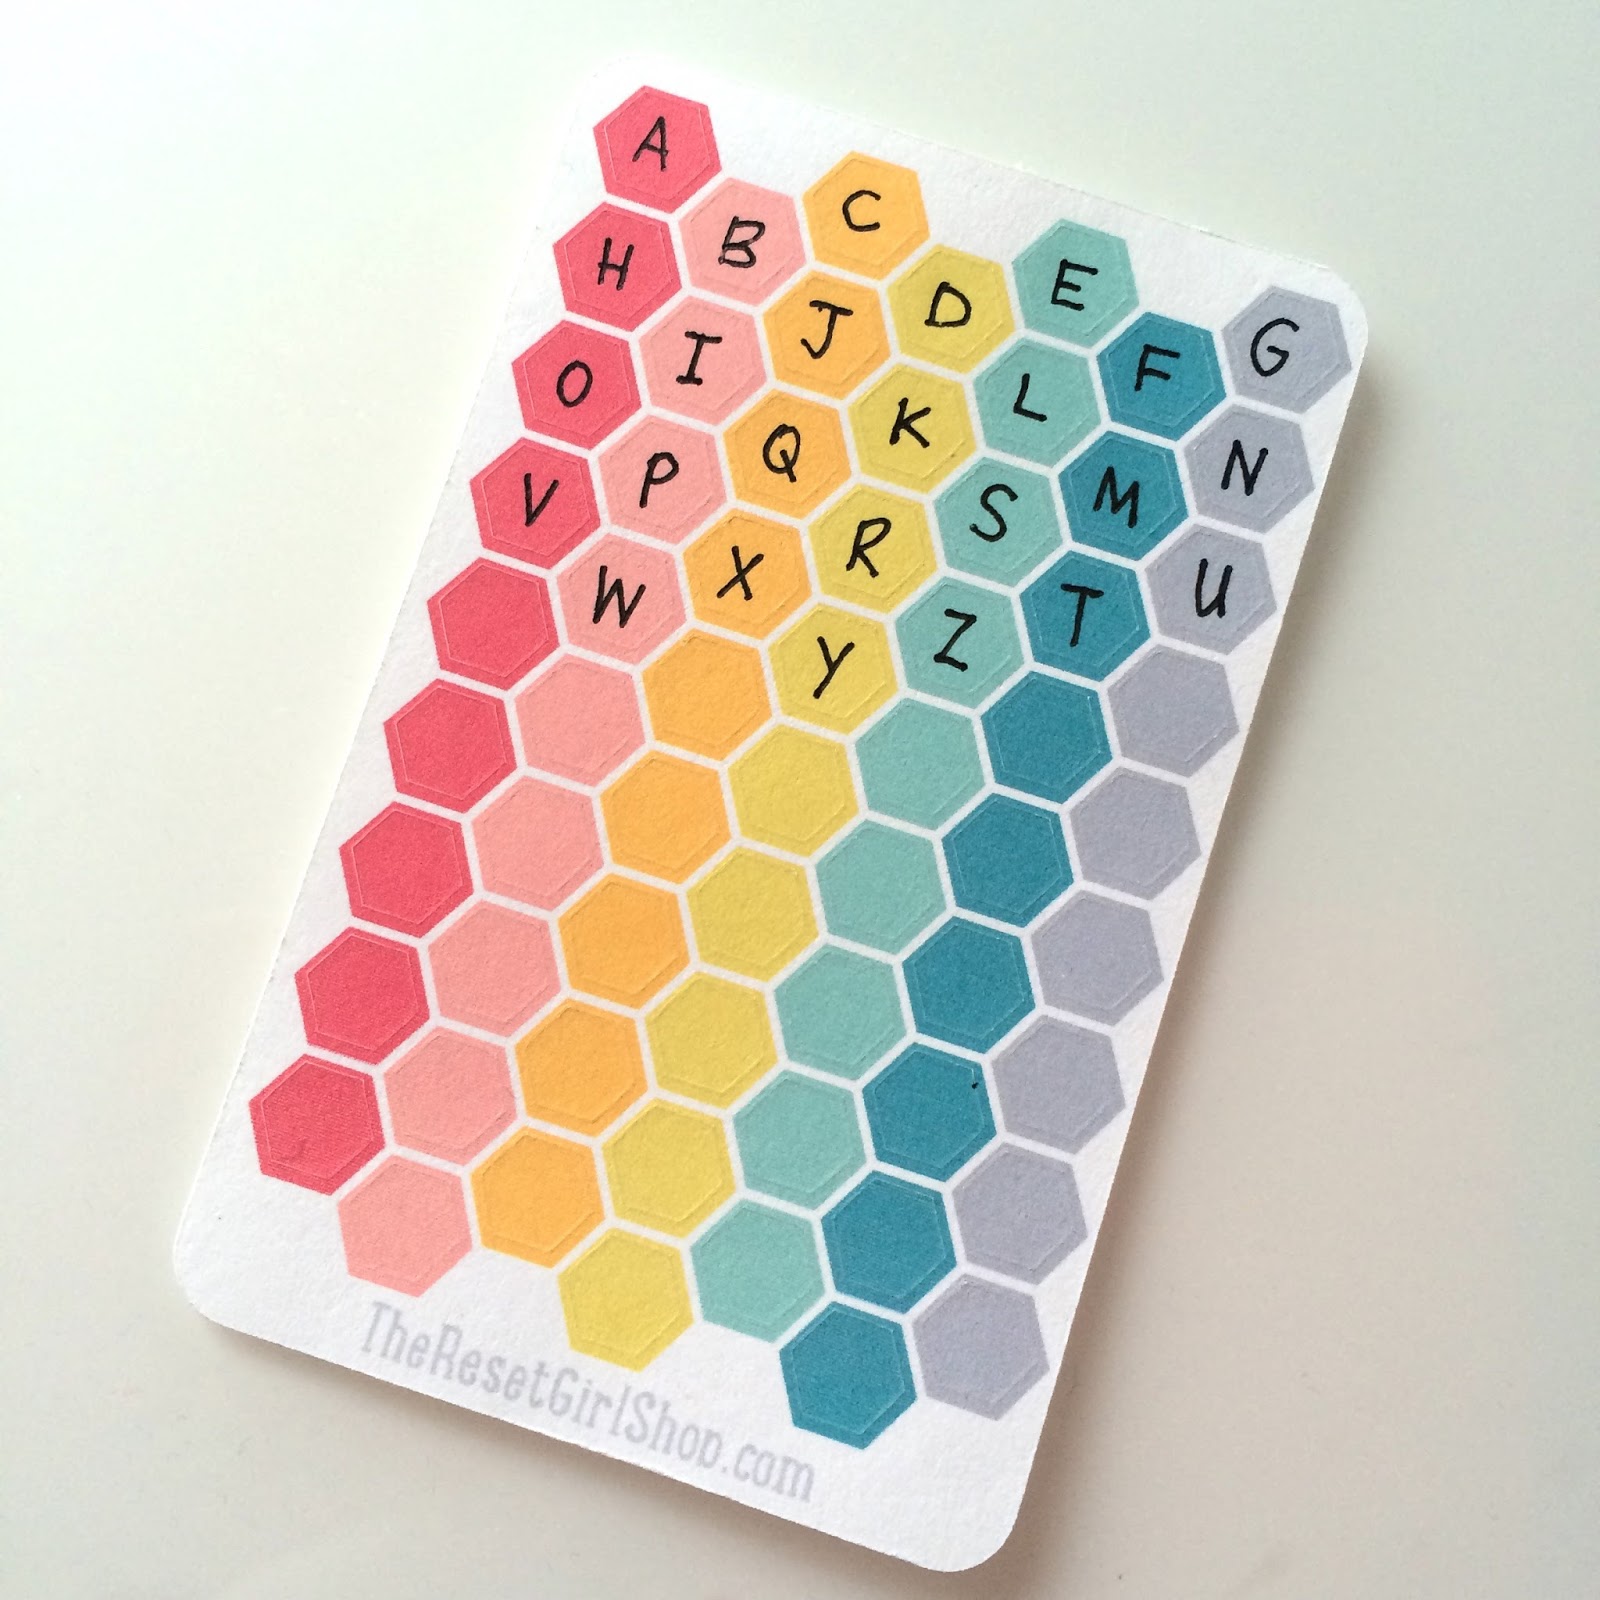
I looked at that little space on the wonder clips and *lightbulb moment* thought about the adorable mini hexie stickers I got from The Reset Girl!

How perfect is that?!
There's loads of those little stickers on one sheet so I wrote out the alphabet and still have room left to write numbers and/or repeat the alphabet if I want to!

Now I can organise all my cut fabric pieces ready for sewing! I also know I can throw them in a pile and they will stay that way ;)

These clips will live in a special little bag inside the bag where I keep my unlabelled wonder clips (phew! I just might finally have an excuse to make a triple zip pouch!). When Clover finally come out with printed wonder clips I would like to have some credit please, although it will be hard to make them look this sweet ;)

Regardless of whether you use wonder clips or not, the mini hexie stickers are perfect for planners, calendars or to label other things.
I have blogged about The Reset Girl shop before, I love using the stickers in my planner, and as a stationery addict I like following Cori, AKA The Reset Girl, on instagram and watching the fun videos on her YouTube channel. This is not a sponsored post, I just happen to enjoy her work and products and want to share the good stuff... so much so that I arranged a giveaway.
As she is such a sweetheart Cori is kindly offering five of you the chance to win a Mini Sheet of Hexies!
*The giveaway is now closed*
The giveaway is open internationally and ends 9th November 2015 (at around 9pm GMT). The five winners will chosen by random.org and contacted by email.
Please please leave your email address in the comment so I can contact you e.g. stickersrule (at) hexiemail (dot) com - unless you are totally sure you are not a no reply blogger!!Good luck :)
is it right?
I've been doing a lot of prep work for the classes I hope to be teaching next year and so I haven't done as much other sewing as I would like recently, though I suspect I would have to sew 24 hours a day to come close to being satisfied! I have no idea where November went to?!
I did manage to sew together my Propellar blocks for my Green Tea and Sweet Beans quilt. I chose to keep the one I cut wrong and I don't think it looks too odd:

I also finished the third Garden Path block:

and while I was doing that I kind of panicked. Am I doing it right? Are my stitches ok? I have no clue! I'm pretty sure it's not even close to perfect and I'm ok with that so long as they will hold up alright! Could anyone who hand sews tell me if this looks right please!? I use a long needle because I find it easier and I'm more comfortable with it because that's what I use for epp. The thread is 50wt Aurifil.

Talking of what's right, my son (who has slight OCD tendencies) received a colouring book recently and decided to count the number of stickers. He was really cross that there were only 50 and my step Dad then suggested he count the pages too. He felt so disappointed that there wasn't over 50 stickers and over 30 pages as the cover stated. So I said he could write a letter to the publishers:

And two days later he received a nice letter of apology, a story book and an activity book. He's thrilled and genuinely happy that they will be correcting the colouring pad for the next reprint! He also enjoyed writing them a thank you note, complete with his own drawing of spider-man.

Now if you will be taking advantage of the Cyber Monday sales, check out these discounts:
The Fat Quarter Shop has 25% off all precuts, no coupon required.

And Pink Castle Fabrics are continuing their big 30% sale with the code CYBER30 valid until midnight tonight (EST) so hurry!

Hope you've all had a lovely weekend and Monday has been kind to you!

Subscribe to:
Posts (Atom)