Aurifil 50 wt
Showing posts with label Aurifil 50 wt. Show all posts
hand piecing a quilt

I am going to show you how to hand piece patchwork, this is my favourite method for making my 1930's Farmers Wife blocks. It is great for small pieces of patchwork, perfect for 'on the go' sewing or relaxing on the sofa sewing!
Please read through the whole tutorial before you begin and if you already do hand piecing then leave a comment with any extra tips you have, I enjoy hearing them! This isn't a tutorial for a particular block, I am just showing part of a block I made in order to demonstrate how to hand piece and how to build your patchwork.
To begin hand piecing you will need templates or a printed version of your block. For the 1930's Farmer's Wife quilt I print out the diagrams from the CD. I am fortunate to have a LightPad, which I use to trace the lines on the diagram onto fabric (in the same way you would trace an embroidery pattern). You could use cardboard, freezer paper or acrylic templates to draw around.
My five top tools for hand piecing are:
1. 1" x 6" ruler - perfect for tracing and drawing smaller shapes
3. black Frixion pen (and I was excited to discover recently you can get refills!)
4. a long thin needle
5. a quality fine cotton thread, I use Aurifil 50wt.

I prefer to use the water erasable pen most of the time but if it doesn't show up on a blue or dark fabric then I use the frixion. As you are drawing on the back of the fabric the black always works well even on very dark fabric but I can't bring myself to use it on white!

Once you have drawn your shapes onto the fabric you need to cut them out leaving at least 1/4" around each side. I often use scissors for this step but for the 1930's Farmer's Wife I have the From Marti Mitchell templates, which allows me to rotary cut. I like using them for triangles, that's why you might notice the corners have been cut off the triangles in this tutorial.
Preparing the pieces for sewing is probably the most time consuming bit and my least favourite part, so I try to get two or three blocks ready for sewing and keep them in small zip lock bags.
Preparing the pieces for sewing is probably the most time consuming bit and my least favourite part, so I try to get two or three blocks ready for sewing and keep them in small zip lock bags.
So you have your shapes cut out and you want to start piecing them together now. I recommend referring back to the pattern at this point to ensure you have the right placement of your pieces and check the order in which you need to sew them together.
Take the first two pieces and place them right sides together, make sure you focus on which line needs sewing - it is really easy to sew along the wrong line (I have done that more times that I would admit!). You might find it helpful to use a clip or pin to indicate which side you are sewing.
Take the first two pieces and place them right sides together, make sure you focus on which line needs sewing - it is really easy to sew along the wrong line (I have done that more times that I would admit!). You might find it helpful to use a clip or pin to indicate which side you are sewing.


Thread your needle and tie a knot at the end of the thread. Put your needle through the corner on the line and come out at the corner of the other piece. At first this might seem tricky, if you find it hard then just do one side at a time, push the first fabric further down your needle and the wiggle the needle around to come out in the right place on the other piece of fabric. You want to be as precise as possible to make sure you are starting at the end of each line (in the corners).
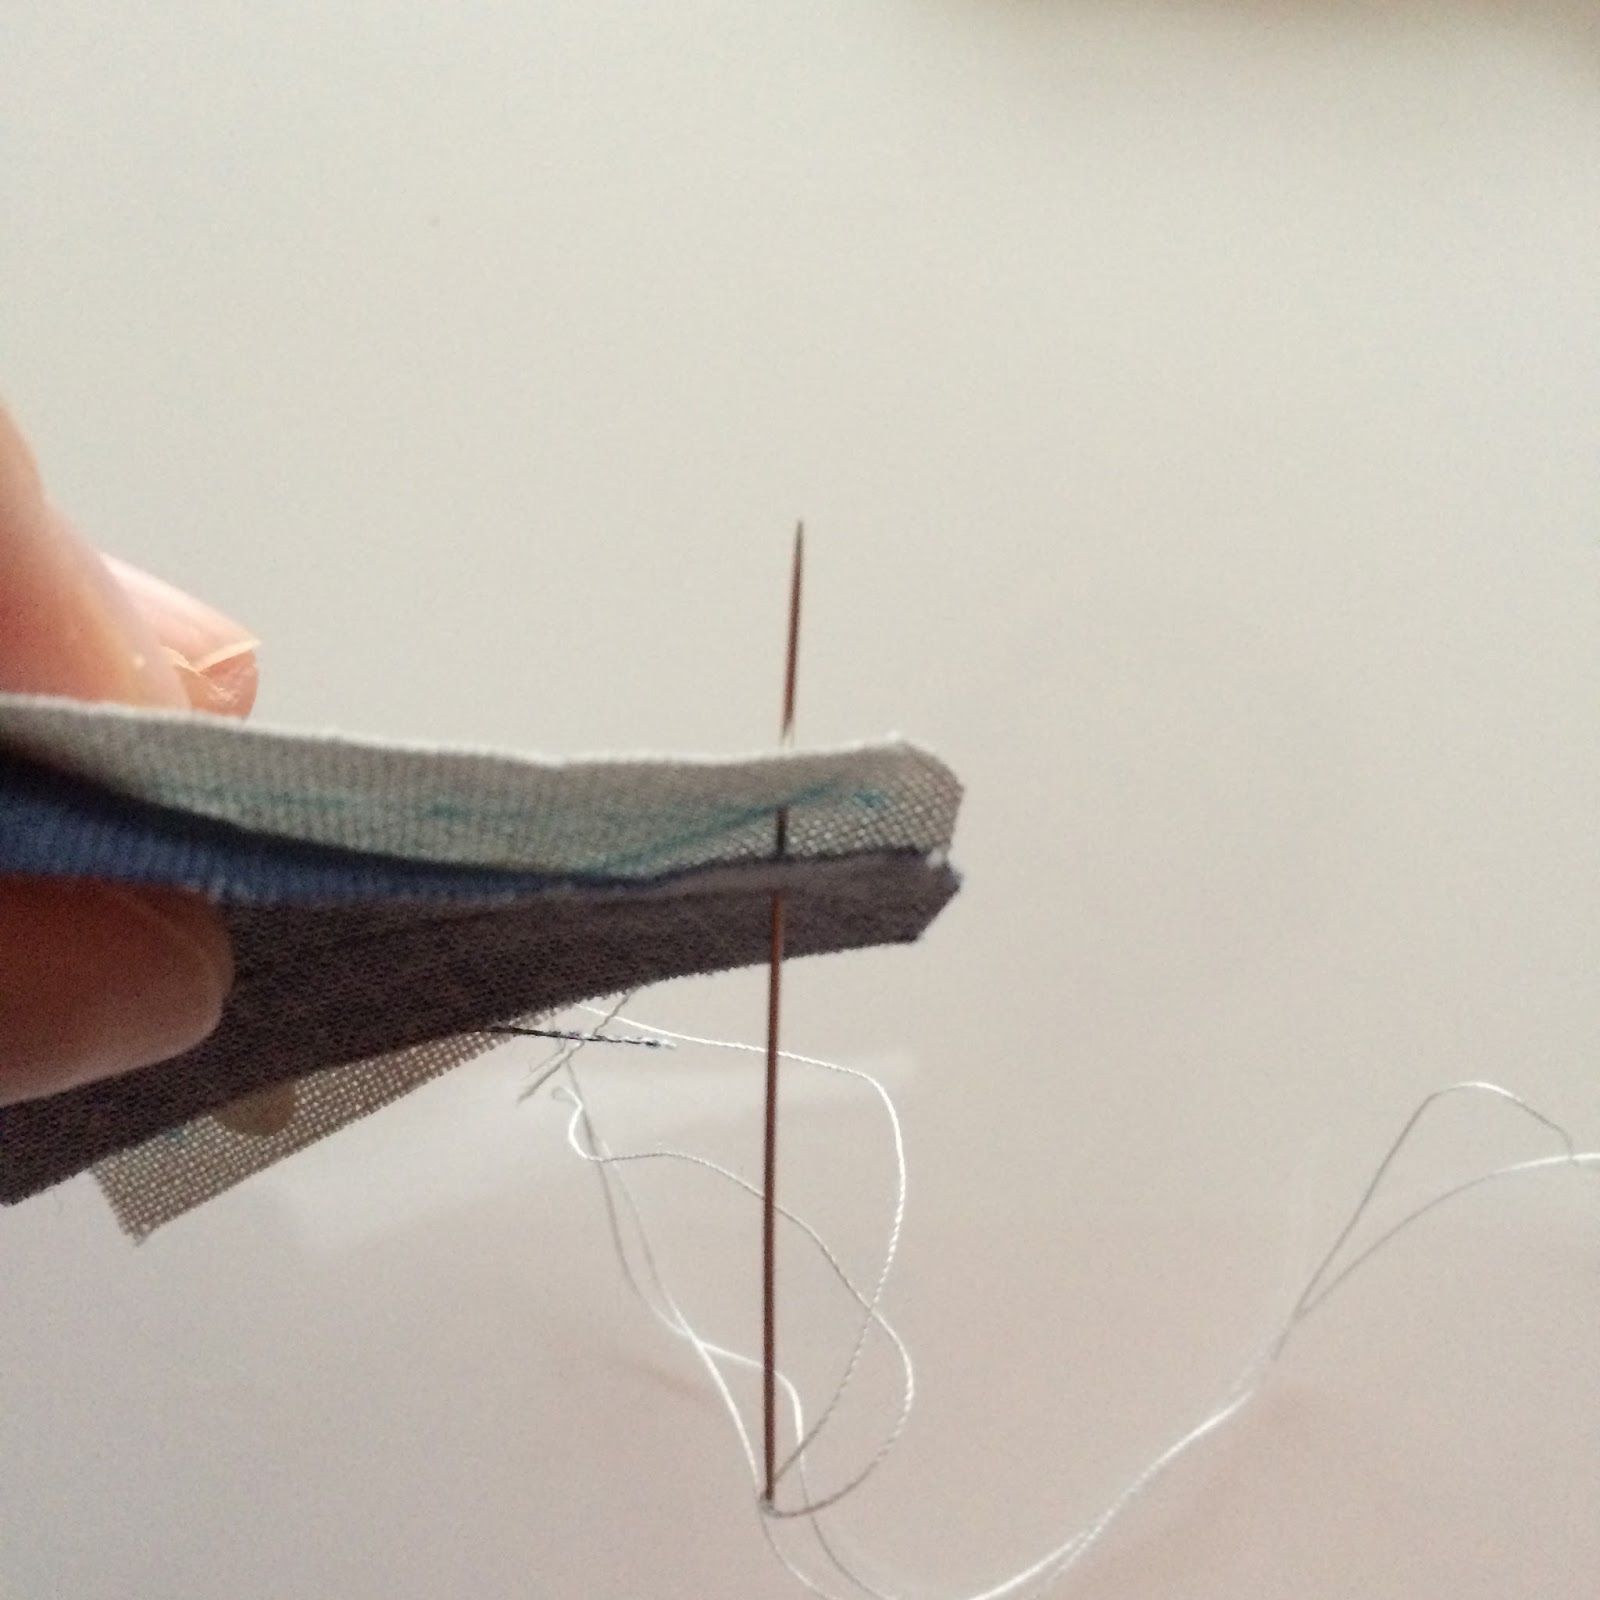

Make a small stitch and once you pull that through do a little backstitch to secure it. Then begin a simple running stitch, you can do one stitch at a time, load a couple of stitches on your needle, or more than a couple if you feel comfortable.


Every few stitches (about every 1-1.5") you should do a backstitch. This helps secure your work. Having had to do some unpicking I can tell you that it does work so it's good to remember and will make your quilts stronger.
As I sew I look at the front and the back of the line of stitching, it's important to keep checking you are straight and on the lines so everything matches up.


Once you reach the end, backstitch and then tie a knot.

So that's one piece done, now you need to add another piece. Here I have joined two half square triangle blocks.
Treat it just the same way, sewing one piece to the other. When joining corners that already have a seam, try to get your needle in the middle, right in the corner, so your points will match nicely.


I repeated those steps and now I have two sections that need joining...

Before I begin stitching I use wonder clips to hold the final corner and the middle seam (I work right to left so keep that in mind if you work left to right!). This means they will stay in place and line up when I reach them.

I begin sewing in the corner (on the right in the picture above) and stitch all the way to the middle - backstitching occasionally if needed. Once I reach the middle I make sure my seams are moved out of the way and then do a backstitch. You do not sew through the seams, you need to keep them out of the way!

To get past the seams I either sew diagonally through the centre of the seams or pass through the seams on one side. Basically you want to start stitching on the other side of the seams without sewing them down.

You want to come out at the corner of your next line:

Then do another backstitch and continue sewing:

When you reach the end be sure that your corners line up so the needle is passing through the corner on each side. Finish with a backstitch and knot.

Keep sewing your blocks together until you are done! I do not press my seams as I go along, mostly because you need to move them as you are sewing, I just give them a good press once I finish each block. If you are joining sections together to make a larger block you could press each section before you put them together to make it less fiddly. I let each block dictate which way to press and try to reduce the bulk as much as possible, whether that means pressing some seams open or make spinning seams - see Cassandra's helpful tutorial here.

EDIT: click here for more tips on block construction for hand piecing!
I hope you find this tutorial useful and are encouraged to try hand piecing. I will try my best to answer any questions if you leave a comment below and you are welcome to share any tips or advice too. Happy hand sewing!
My thanks to Helen for all her great advice and for helping me start hand piecing :)
Butterfly Puzzle Quilt

I based this English Paper Pieced quilt on a geometric fabric print, after Nicky suggested it. The pattern was a bit of a puzzle to work out but I really enjoyed doing it. The mad mix of fabrics makes for a bright and cheery quilt and the Lizzy House Catnap print makes it a cute I-spy! You can see a list of the fabrics used here.

After considering some sort of straight line quilting I decided instead to do some random overlapping circles in various sizes. The quilt was pieced and quilted with 50 wt Aurifil.

I will be teaching my Butterfly Puzzle class on Monday 16th November, all the details of my classes will be posted HERE. See the Patchfinders website for a list of all the classes and how to book.
✓ another check off my finish-along list (#9 EPP mini quilt)!
when I was two I was nearly new {thank you giveaway}
*GIVEAWAY NOW CLOSED*
This week my blog is two. It has been such an amazing experience to connect with so many cool and interesting people and to share my sewing journey with you. Here's some of what I've made over the past two years:


I'm really just beginning to discover the things I love to sew and my style. All the wonderful patterns, tips and techniques in the blogging world have helped me learn so much. I'm excited to carry on working on my skills and showing you my progress; laughing and making mistakes along the way.
To say thank you to everyone and anyone who reads this blog I have gathered together an amazing bunch of goodies to give away, courtesy of my wonderful sponsors and fabulous companies - all of whom I use and highly recommend. I am truly grateful for their generosity and would encourage you to visit and support these shops and products, without which I wouldn't be able to make such pretty things!
Here is the MEGA haul you could win...
I use Aurifil in all of my projects and the 50wt is perfect for piecing and quilting, they are gorgeous threads.
The wonderful Alex from Aurifil has sent this incredible box of 50wt threads in beautiful colours for me to giveaway:


You can now buy Aurifil from all of my sponsors!
ChristaQuilts has been selling fabric online since 2003. When Christa's husband quit his job a few years later to help her full-time, he decided if you can't beat 'em - join 'em! Christa's goal is to inspire quilters to find joy in creating their own quilts by providing an eclectic mix of fresh, modern and fun fabrics, effective tools, and easy-to-follow instructions in a warm, friendly atmosphere. You can join Christa on her blog ChristaQuilts.wordpress.com.
Christa Quilts is giving away a $20 gift certificate to spend on anything in the shop:

The Fat Quarter Shop was founded in 2003 by Kimberly Jolly. From the very beginning, she was committed to delivering top-notch service for every single order and customer. As the Fat Quarter Shop's reputation grew, Kimberly decided to make it a full-time operation. Her husband Kevin joined her not long after, and with his help, lots of hard work, and a tireless commitment, the store began to grow. Over the past few years a few more people have joined the staff! As a team, they continue to branch out with the best fabrics, exclusive kits, quilt clubs, BOMs, and more. And they will always be driven by the passion that Kimberly founded the store upon, which is always giving you the best products and service!
The Fat Quarter Shop are giving away a jelly roll of High Street by Lily Ashbury:

Fluffy Sheep Quilting, launched in spring of 2012, is focused on providing fresh, modern fabric for today’s quilter. Take your time and browse the shop. You are bound to find a little creative inspiration or just the right fabric for a project you have in mind. Fluffy Sheep Quilting carries a gorgeous selection of Kona solids, luscious fat quarter bundles, silky Aurifil threads and handmade quilts. Be sure to check back regularly for new arrivals or seasonal sales. Cindy, the energy behind Fluffy Sheep Quilting, started making her own quilts in 2010 and can not seem to stop! Cindy found it difficult to find crisp, fresh, modern quilting fabric in Ireland, so she was inspired to create an online fabric shop.
Fully Sheep Quilting is giving away this gorgeous stack of DMC Perle Threads no.8 in fabulous rainbow colours:

And finally I recently purchased some fabric from Modern Yardage and was so pleased with the excellent quality and great range of prints. A new digital textile fabric manufacturer, Modern Yardage is dedicated to bringing fresh, contemporary, fun fabrics to the modern sewist. Focusing on a high standard of quality at a great price point, Modern Yardage features a curated team of designers to bring you on trend & fun fabrics for sewing quilts, garments, and endless other projects.
The fabric designs are never discontinued because they print them when they are ordered, all fabric is pre-washed before printed so it won't shrink, and designs are available in 3 scales and multiple colourways. Genius!
Please like Modern Yardage on Facebook and follow them on Instagram.
Modern Yardage are giving away a $25 gift certificate to spend on fabric in the shop:


Again a huge thank you to the sponsors of my giveaway and please show them your support or go and thank them on Facebook:


**GIVEAWAY NOW CLOSED**
MAKE SURE I HAVE A WAY TO CONTACT YOU - 'no reply' bloggers won't win so if you want to win you should leave your email address in the comments.
The giveaway is open internationally, a winner will be chosen by random.org and the winner will be announced on the blog on the 4th September.
Easy peasy!
Thank you lovely readers and good luck!
*please note that although I usually reply to comments I am not able to reply to all the giveaway comments
Car seat quilt and a 2CV, made while I wait

It started when the generous and delightful Hadley sent me this lovely package of paper and fabric hexies she cut. I was going to wait until the baby had arrived to sit and do something with them but I'm impatient (clearly!) and couldn't resist jumping in.
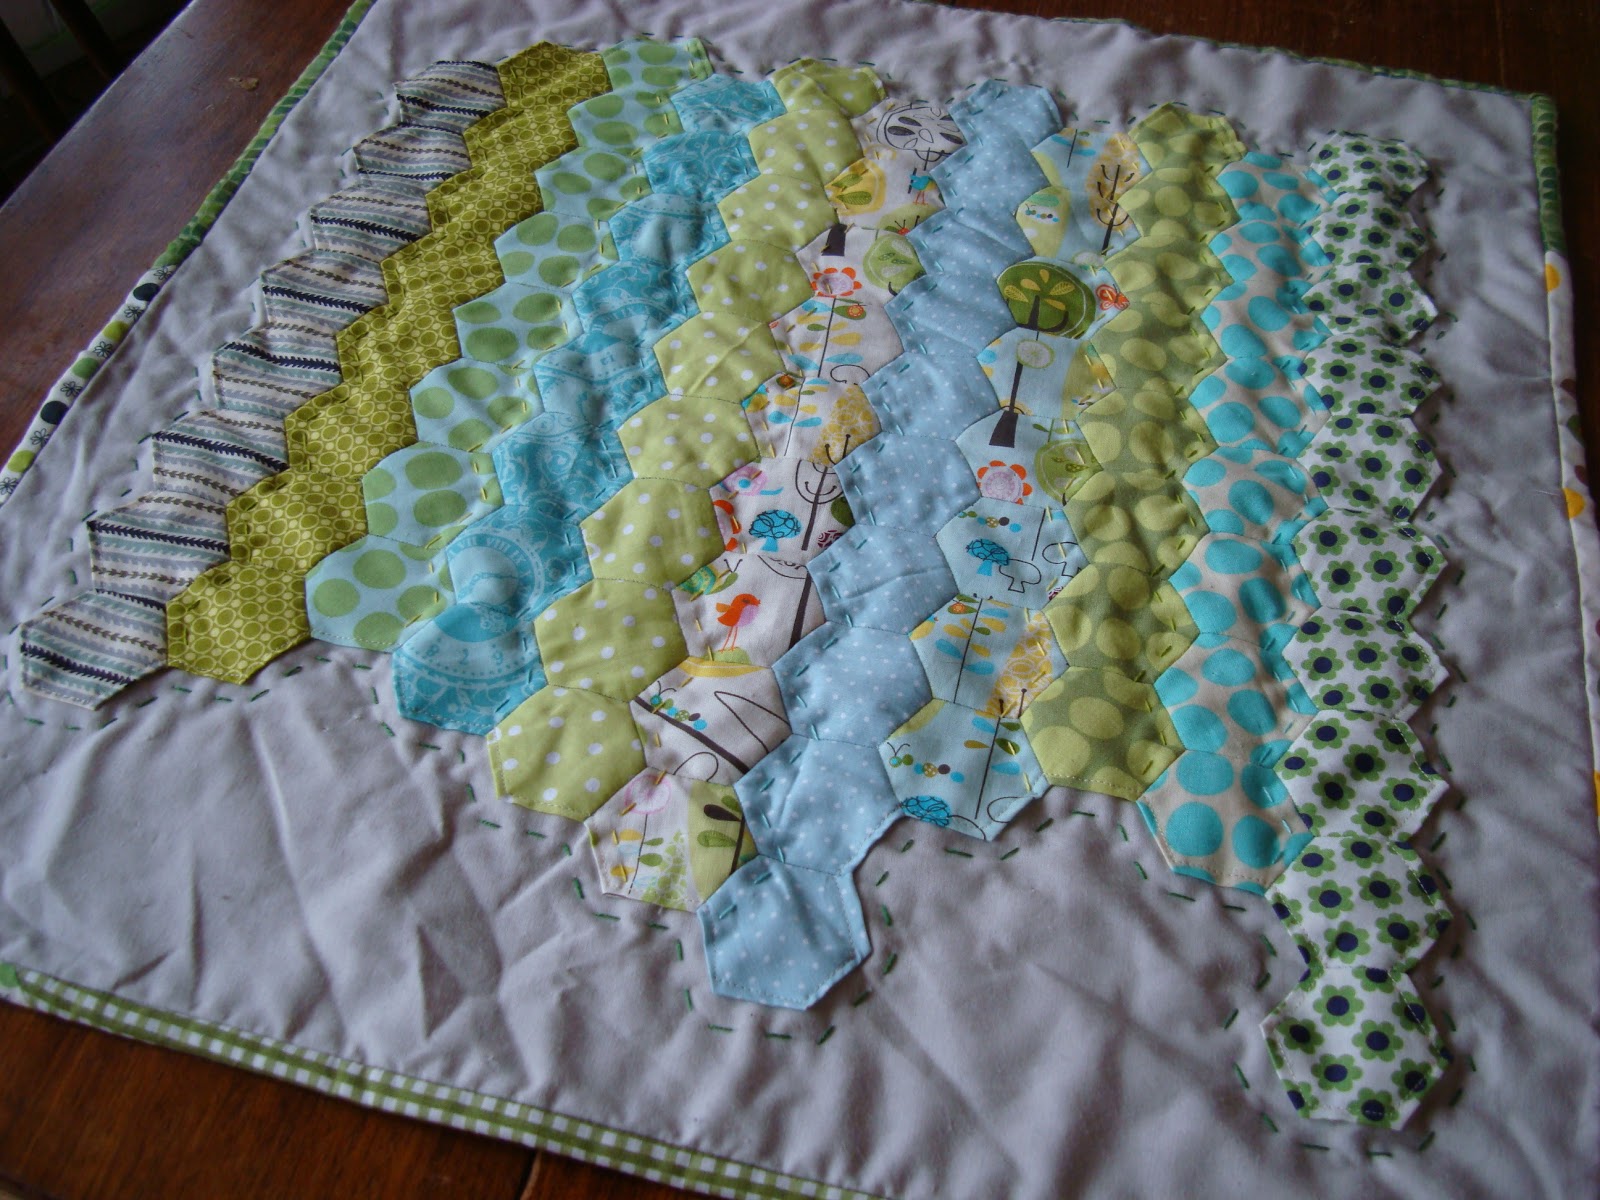
I had originally thought of making a cushion but since we are getting prepared and got the baby car seat out of the attic, I decided a cute car seat quilt would be a nicer idea.
Huge thank you again Hadley!!
It took a while to decide on what pattern to make - I was going to go with flowers but then I decided I wanted something a little different (and more neutral) so I made rows of different lengths and sewed them together. I apologise that it's all crinkly but that's what happens when you hand quilt something and I have NO desire to do any ironing ;)


I added some other fabrics from my stash and think they blend well all together.
It was pieced using Aurifil 50wt and then appliqued on to some Kona Ash (from Fluffy Sheep Quilting) - I just stitched around the edges on my machine. I then hand quilted it using Anchor Perle around the hexies and down some of the rows. I felt much more confident hand quilting after I read Susan's post - reassuring and helpful - thanks Susan!
The backing is a brushed cotton, which I think my cousin gave me - it's so soft and I love the gingham!


The binding was made of scraps of binding I'd used in other projects - love that, it's like it's ready made!
Because I stitched the hexies onto the background it looks a little 3D - I like that it makes the hexies stand out:

I also haven't shown you this little bag I made my mum for Christmas. She actually used to drive a green citroen 2CV and then she had a white one - so I knew she'd love this great little panel of fabric I got from the Festival of Quilts. It is made by Il était une fois, an adorable family business in France. I was with Nat and learnt a little more about them because she could talk the native language :)


I used the Summersville I embroidered on the back and happily she loved it!
Linking up:

over at Quokka Quilts this week, she has a few fab little finishes to share
and has made me want a laundry basket trolley!!

and Finish It Up Friday at Crazy Mom Quilts

Subscribe to:
Posts (Atom)