
I sneakily got the girls to find out her favourite colour... blue! I went through my stash and picked out loads of blue prints, many of which were leftover from previous projects. My fabric stash is not coordinated by colour, much of it is organised by designer or style of print instead - it just makes sense to my brain that way. So it's always interesting when I do go to shop my stash for a certain colour, I never quite know how much I'll have.
It was a bit of a tight deadline to get the quilt made so I decided to keep it simple, with mostly patchwork squares and some star/cross blocks using the blue fabrics I had more of.

Playfully dispersed amongst the patchwork squares are these Kitty Cornered blocks, made using the fabulous Kitty Cornered Ruler by Creative Grids, from Natasha Makes. I have used Creative Grids rulers ever since I started quilting; they are incredible quality, so easy and intuitive to use and they have so many useful and fun rulers. The Kitty Cornered Ruler means you can make the blocks as above and then put them together, as below, or use them in different ways to create even more patterns.
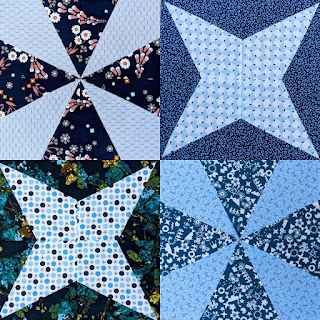
The points are perfect because of the accuracy of the ruler and they are so quick to make too. I had a lot of fun mixing up the prints and playing with value.
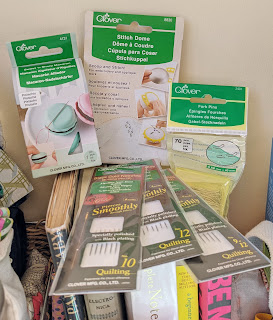
I was very kindly sent a selection of Clover products, again I have been using Clover products for a long time and always recommend them. As these products were supposed to be promoted last year I am probably kicked off that PR list but you do have to spend time actually using things before recommending them (the things I don't recommend just never end up on my blog or social media!).
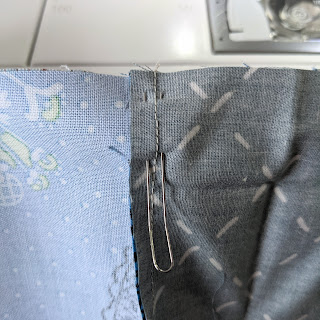
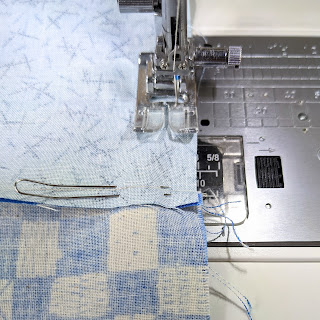
You can see I don't pin right to the edge, I do pin on the left because I don't take pins out as I sew (sorry not sorry quilt police!). The Clover Fork Pins are angled so they are really easy to position and this just works.
I'm keeping them right next to my machine...
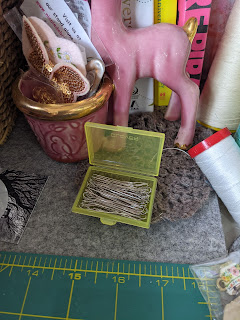
because look at this:
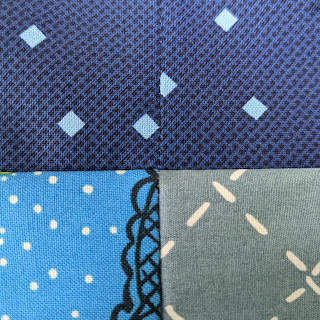
I experimented with seams pressed in different ways too because that can make a difference to points matching. This one was one open and one to the side.
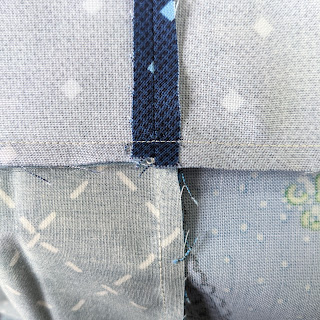
This was with both seams open:


It works with nesting seams - to each side - and open and each time it was perfect. Have you tried Clover Fork Pins? Are they pretty magical for you too? If you try them let me know!
The pinning continued until the quilt top was complete 💙


from left to right: Aurifil 50 weight thread in Jade #4093; Bright Teal #1320; Light Turquoise #5006 and Turquoise #2810

The quilting was done using a trusty favourite decorative stitch on my Elna 680+. The texture from this stitch is just gorgeous. Starting with one colour, quilting lines across the quilt and then going back in with the other colours randomly. I didn't quilt too densely, again because of the time crunch but that just means it drapes nicely and it still looks and feels beautiful.


Finally the binding, always one of my favourite parts and I even have a favourite needle just for binding.

This is where the next Clover product comes in, the adorable Sweet 'n Sharp Macaron needle sharpener and minder. You may have seen this all over social media. It is super cute and I can confirm it totally works. It gave a new sharpness to my trusted needle.


The middle part does the sharpening, the top part is the magnet. It's a handy little gadget to have in your sewing kit. And it is little, smaller than I thought it would be, but then it doesn't need to be bigger to do it's job and I am happy as it takes up little space in my sewing bag.

It also works to hold wonder clips and stop them getting lost in the sofa! I often use wonder clips when doing English Paper Piecing too and the macaron is handy then as well.

I'm so pleased with how the quilt came together and it's such a peacefully but happy looking quilt I think. I hope it will be loved, taken to the beach, enjoyed and snuggled.


It was simple to piece and just the kind of sewing needed at the time. Whimsical block making, everything coming together nicely with those pins and the freedom of using such lovely colours randomly for the quilting. A lot of love and gratitude was poured into this quilt as it was made. The Shining Blue Quilt.

3 comments
Post a Comment
Must find my forked pins, forgot I had them.Beautiful quilt Lucy.
It’s a gorgeous quilt, I bet the recipient loves it. And the forked pins and macaron look particularly handy, I shall be watching out for them when I’m next shopping for sewing notions. Hooray for finishes *waves pompoms*
Blue is my fave, so I think this is gorgeous. Thanks for sharing your technique, I may have to invest in those forked pins what a great idea!